Discover, Share, Enjoy
Welcome to Supper Social. Start browsing or share your signature dish today!
never miss a recipe
Subscribe to receive a monthly email with our latest recipes.
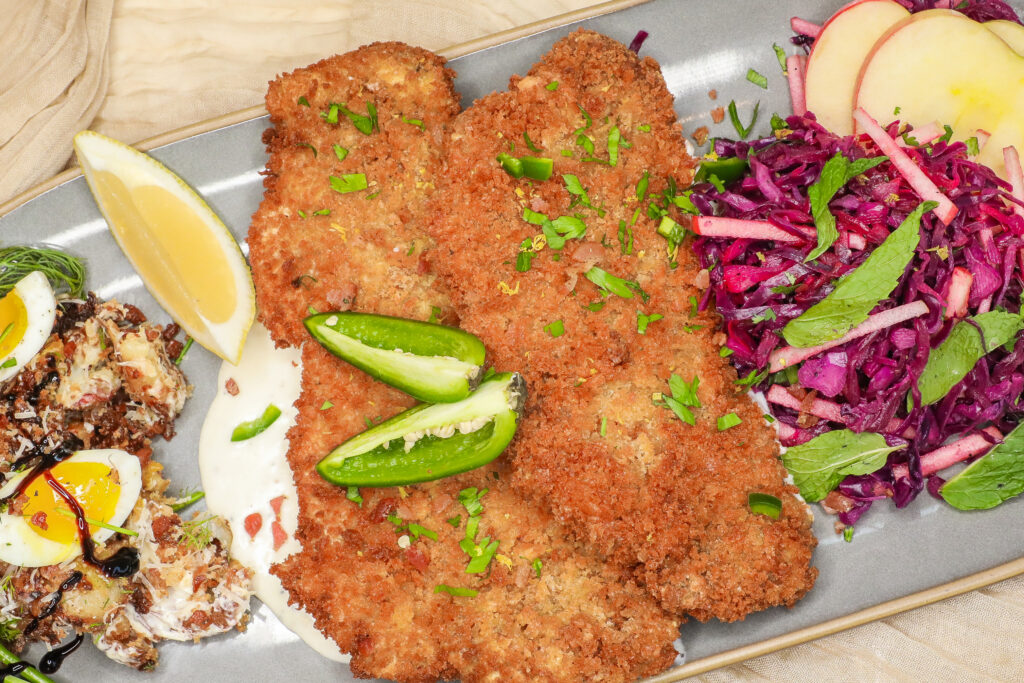
Texas Schnitzel: A Delicious Fusion You Can’t Miss
One of my favorite aspects of New Braunfels, TX, is its rich cultural tapestry. The town’s deep German roots are beautifully reflected in its traditions, architecture, and events, like the internationally famous annual celebration – Wurstfest. Beyond the delectable German cuisine, the Southern culinary influences rooted in deep Texas culture offer a delightful array of comfort foods highlighting ingredients such as bacon and jalapeños.
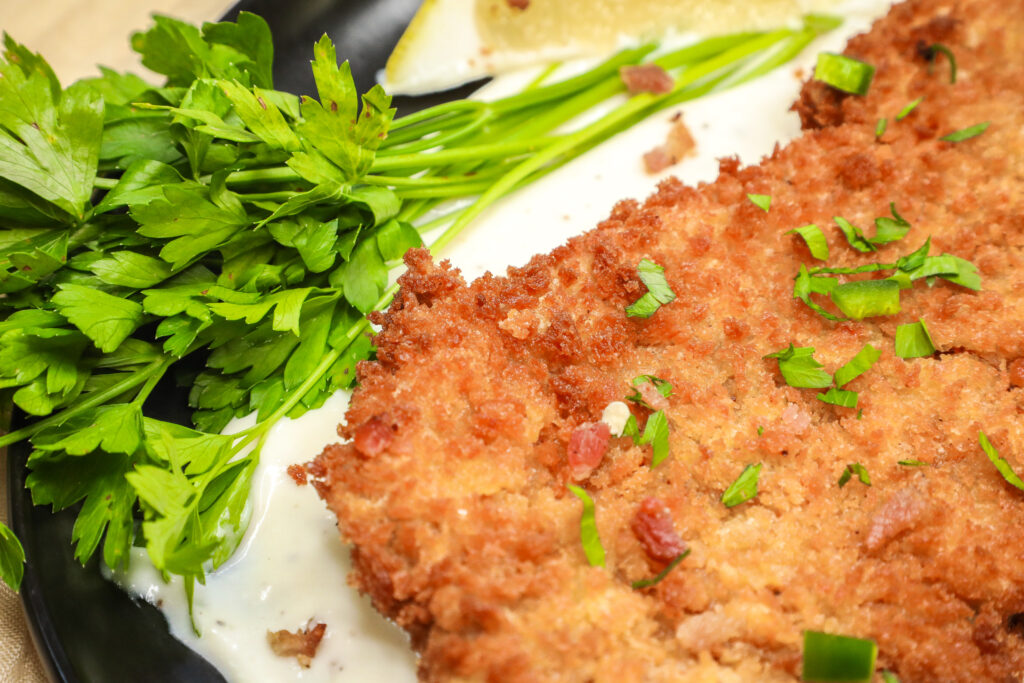
If you’ve been following my writing for a while, you know I can’t resist a good fusion recipe. Today, I present one you may not have tried before. Follow along as Josh Kemp masterfully balances ingredients from two diverse culinary traditions to create the perfect mash-up.
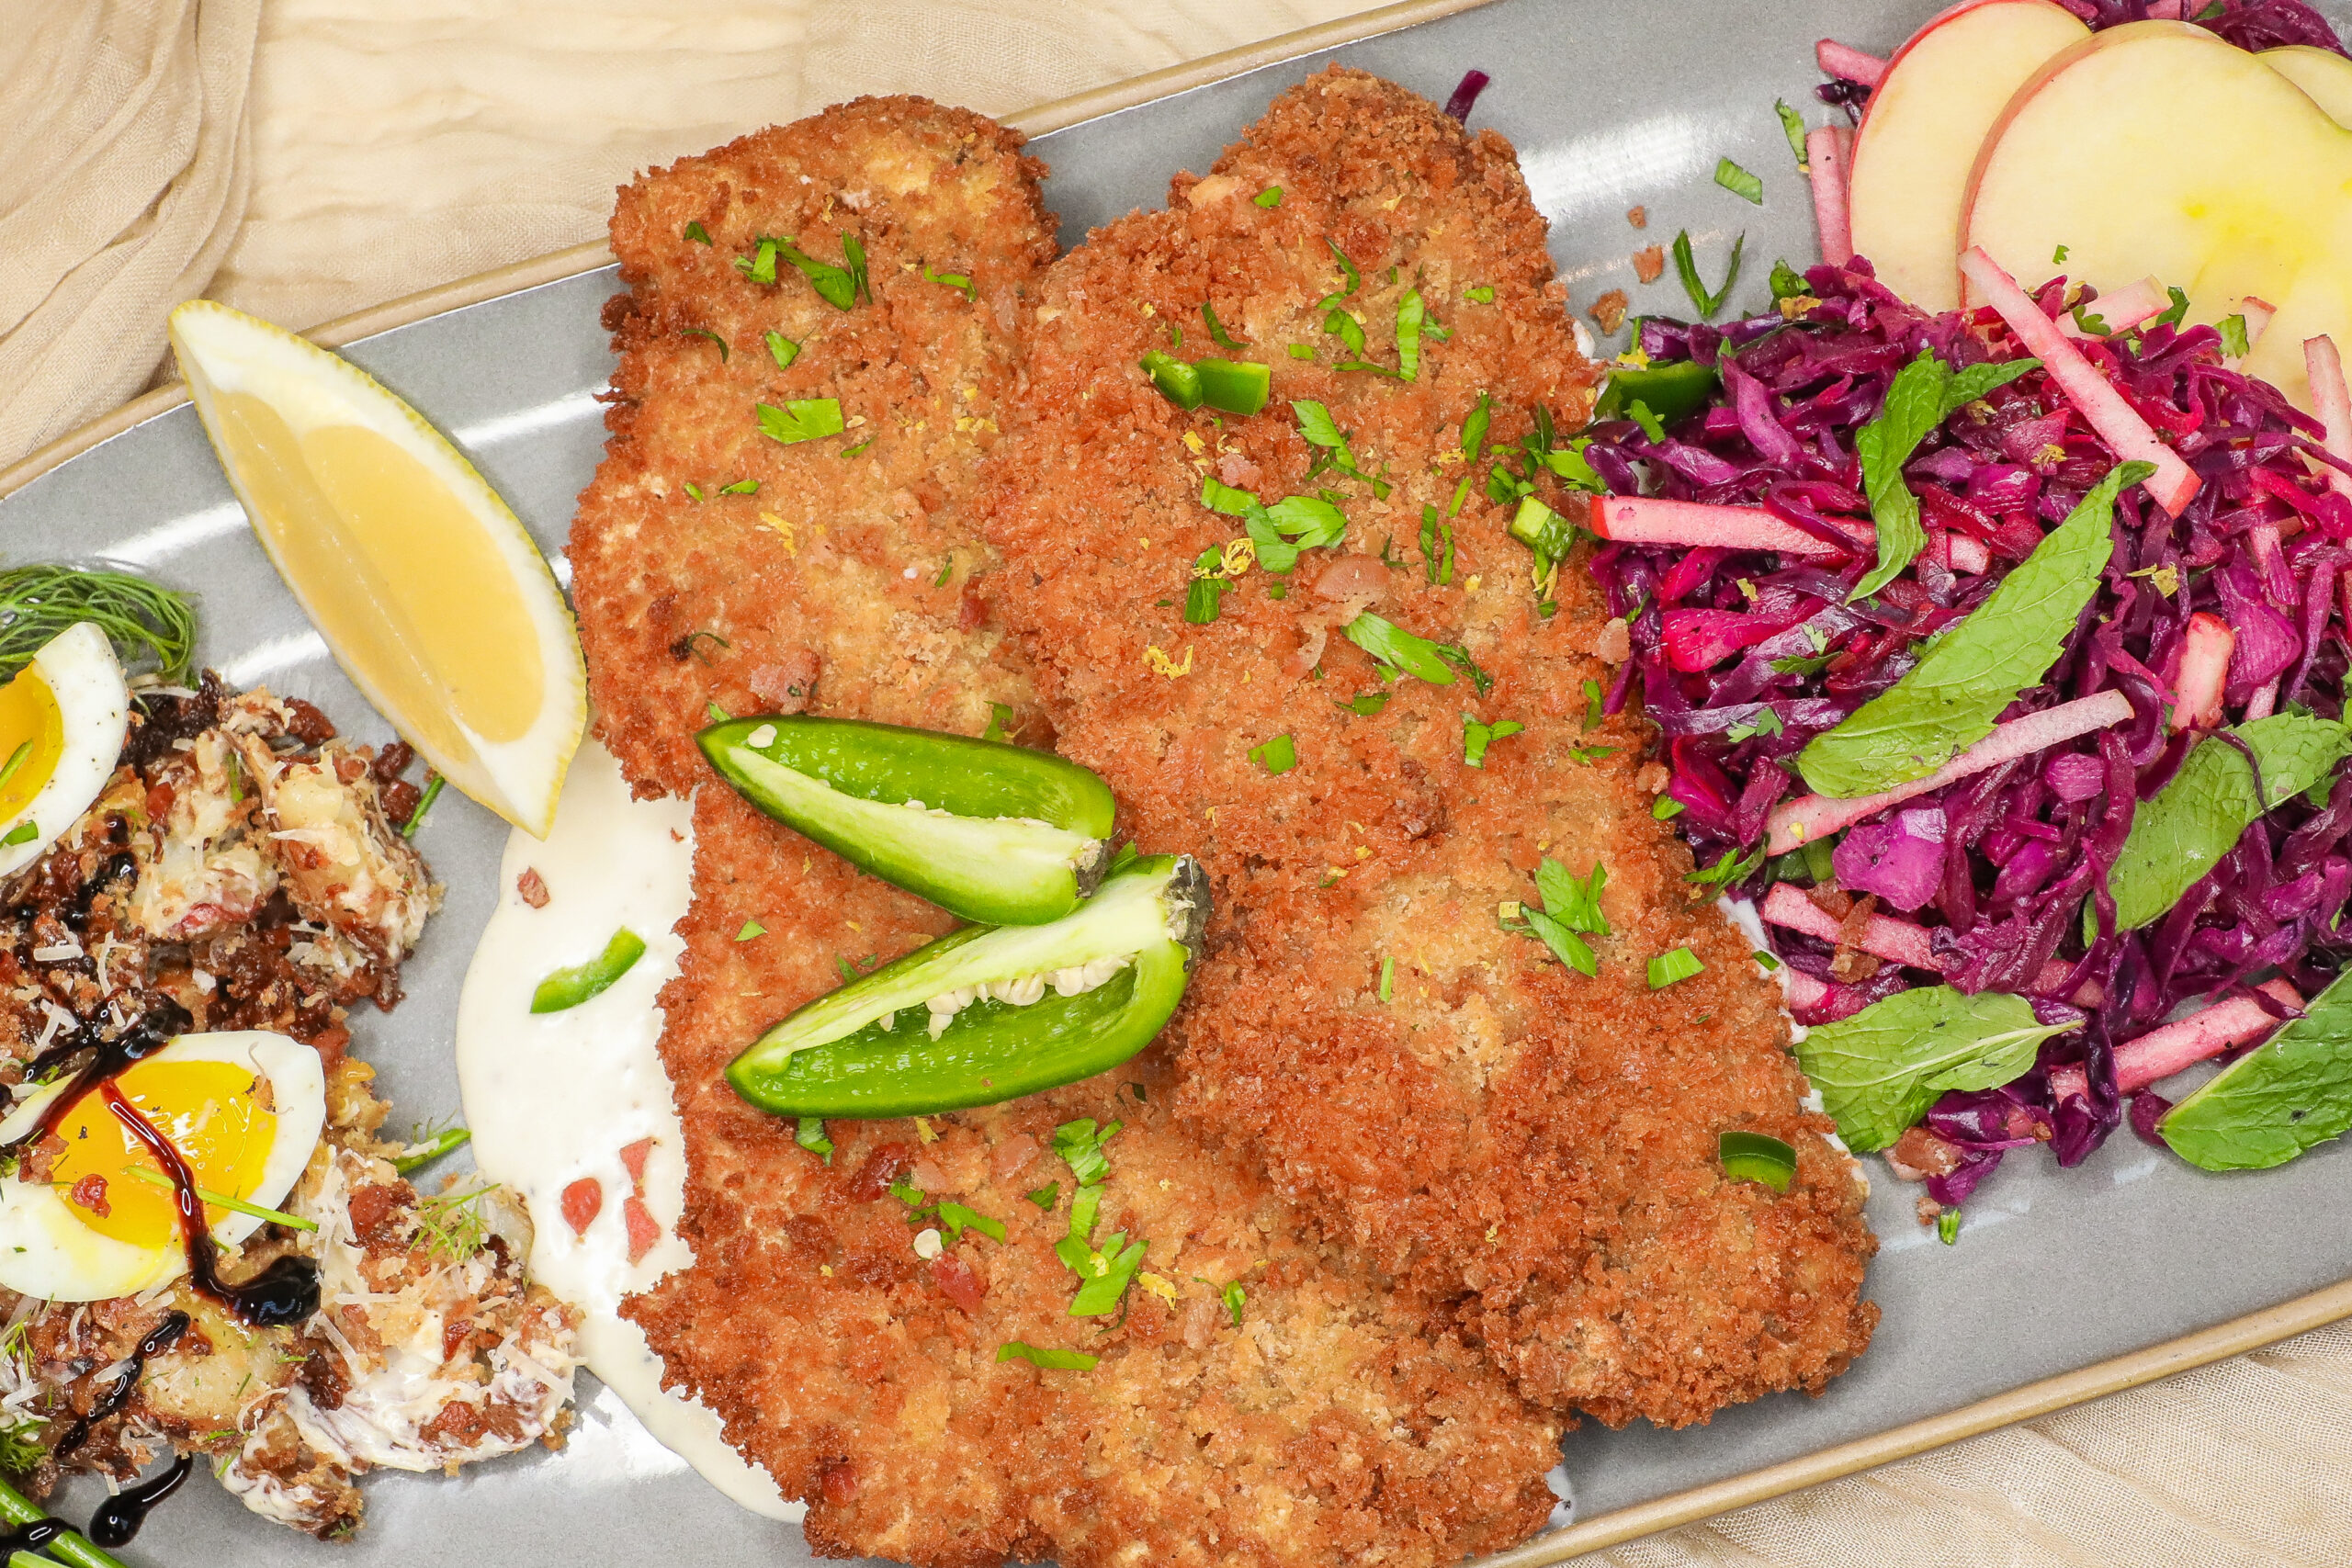
Discover the delightful blend of traditional German flavors infused with Texan spice and creativity for this unique spin on the classic pork schnitzel. This dish is elevated by a rich bacon jalapeño cream gravy that delivers a distinctly Texan flair. Josh’s culinary creation is accompanied by a warm red cabbage and mint slaw, providing a vibrant crunch and a tangy note. To complement the meal, I’ve crafted an unconventional fried potato salad, enriched with fresh herbs for an added burst of flavor.
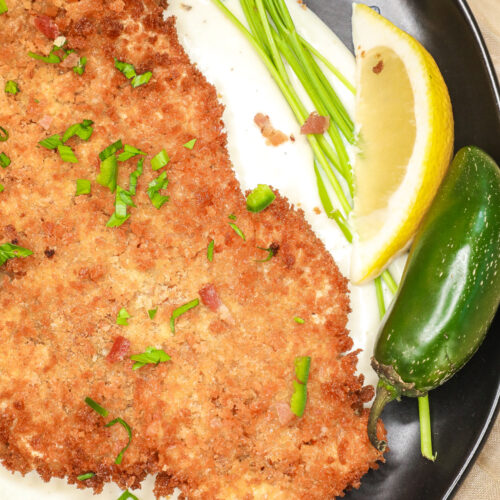
Texas Schnitzel
Ingredients
- 1 Lb Pork Tenderloin
- 2 Tbsp Smoked Paprika
- 1 Tbsp Garlic Salt
- Fresh Ground Pepper To taste
- 2 Cups Neutral Frying Oil
- 4 Eggs Lightly beaten together
Seasoned Flour (Suggested seasonings)
- Smoked Paprika
- Garlic Salt
- Onion Powder
- Chili Powder
- Dried Thyme
- Panko Flakes
- 3 Pinches Flaky Salt
Garnish
- Parsley
- Lemon Wedge
Instructions
- Cut the tenderloin into three equal pieces. Place one piece on a cutting board, cover it with plastic wrap, and pound it with a meat mallet until it’s evenly flat and about ½ inch thick or thinner. Repeat with the remaining pieces of tenderloin.
- Season all three pieces generously on both sides with Smoked paprika, garlic salt, freshground pepper.
- Layer the schnitzel individually with butcher paper, cover, and refrigerate for up to 24 hours.
- When ready to cook, add oil to a large pot that can comfortably fit at least one cutlet.
- Slowly heat the oil to 350 degrees F
- While the oil heats, remove the pork from the fridge to let it come to room temperature.
- Set up a battering station with three separate containers: one for beaten eggs, one for seasoned flour, and one for panko flakes.
- Coat one cutlet at a time in seasoned flour, then dip it in egg, and finally coat it with panko flakes. (Pro-tip: Use one hand for wet ingredients and the other for dry).
- Ensure an even coating of flour and egg to help the panko adhere better for optimal texture.
- Fry each cutlet one at a time in the hot oil until golden brown.
- Remove the cutlet from the oil and check its internal temperature for doneness.
- Add a pinch of flaky salt to each schnitzel and allow them to drain on a paper towel or wirerack.
- When ready to serve, sprinkle with parsley and garnish with a lemon wedge

Bacon Jalapeño Cream Gravy
This Texas-inspired schnitzel is simply incomplete without a rich and creamy jalapeño bacon cream gravy—nothing embodies Southern comfort food quite like it. The smoky flavor of the bacon combined with the spicy kick of jalapeños elevates the dish to a whole new level. This delightful combination creates a seamless fusion of Texan and German culinary traditions, bringing together the crispy, golden-brown schnitzel and the luscious, savory gravy that pours over it. Each bite offers a harmonious blend of textures and flavors, making it a must-try for anyone who appreciates hearty, satisfying meals.
Bacon Jalapeno Cream Gravy
Ingredients
- 4 Strips Bacon Diced or thinly sliced
- 1 Jalapeno Pepper Finely Diced
- 1 Tbsp Fresh Ground Black Pepper
- ¼ Cup All-Purpose Flour
- 2 to 3 Cups Whole Milk
Instructions
- Preheat a wide pan to medium heat.
- Cut the bacon into small pieces and fry until crispy.
- Remove the bacon from the pan and set aside.
- Add jalapenos to the pan, then remove them as well.
- Add fresh pepper to the bacon grease in the pan and cook for 20-30 seconds.
- Reduce the heat to low and add flour to the bacon grease.
- Mix well, scraping the bacon bits from the bottom of the pan.
- Once the flour is incorporated, add one cup of whole milk.
- Stir continuously until the gravy begins to thicken.
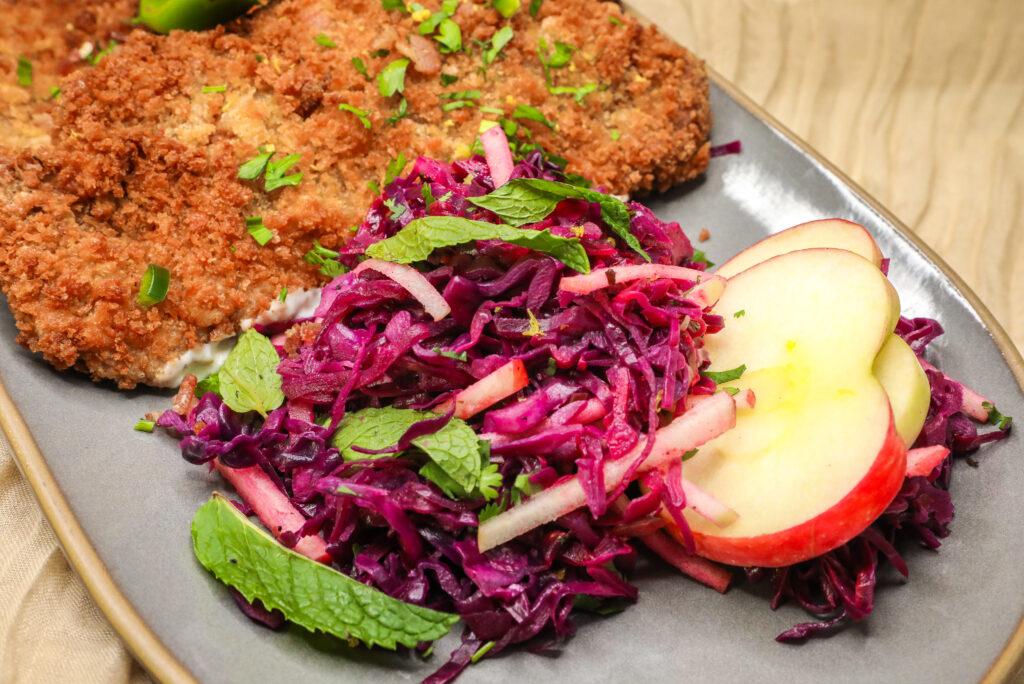
Warm Cabbage Slaw
No self-respecting German meal is complete without a cabbage dish. Traditionally served as a side salad, Krautsalat, or German coleslaw, provides a simple yet refreshing counterpoint to hearty main courses like schnitzel. This lightly dressed cabbage salad is both tangy and savory, offering a zesty crunch that enhances your dining experience. It pairs beautifully with meat dishes, adding a touch of freshness to the rich flavors on your plate. Discover a new and exciting twist on this classic with warm cabbage slaw, revitalizing an old tradition.
Warm Cabbage Slaw
Ingredients
- 1 Red Cabbage Small head cored and thinly sliced
- 1 Tbso Rice Vinegar
- 1 Lime Zest and juice
- 2 Tbsp Neutral Oil Ex. Avocado oil
- ½ Red Onion Large, thinly sliced
- 1 Tsp Brown Sugar
- 2 Tbsp Salted Butter
- 1 Apple Envy or Red Delicious, peeled and julienned
- 1 Tsp Fresh Black Pepper
- ¼ Cup Cilantro Finely Diced
- ¼ Cup Mint Finely Diced
Instructions
- In a mixing bowl, combine cabbage, vinegar, lime zest, lime juice, and diced pepper.
- Toss the mixture and let it marinate for at least 30 minutes.
- When ready to prepare the slaw, sauté onions in a pan over medium heat for 3 minutes.
- Add garlic to the onions and sauté until fragrant.
- Stir in brown sugar and butter, allowing them to melt.
- Add the marinated cabbage mixture to the pan.
- Season with black pepper and mix while cooking to achieve the desired texture (preferably crispy).
- After a few minutes, taste for texture and seasoning.
- Transfer the slaw to a serving bowl and let it cool slightly.
- Mix in apple, cilantro, and mint, and adjust seasoning to taste.
- Serve immediately.
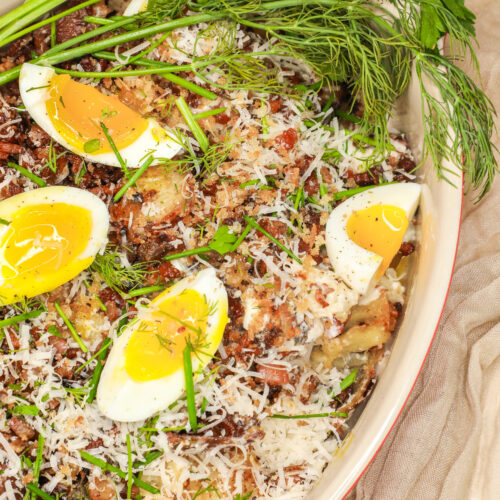
Twice Cooked Reunion Potato Salad
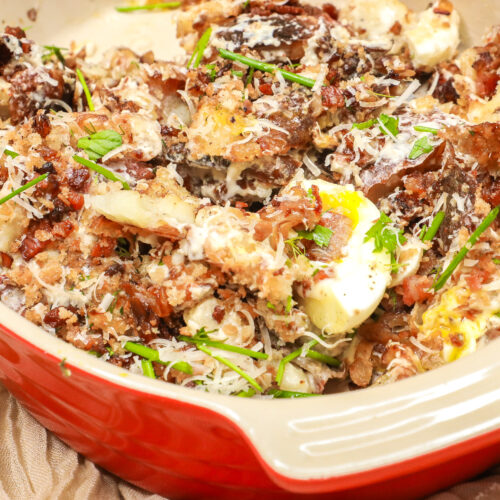
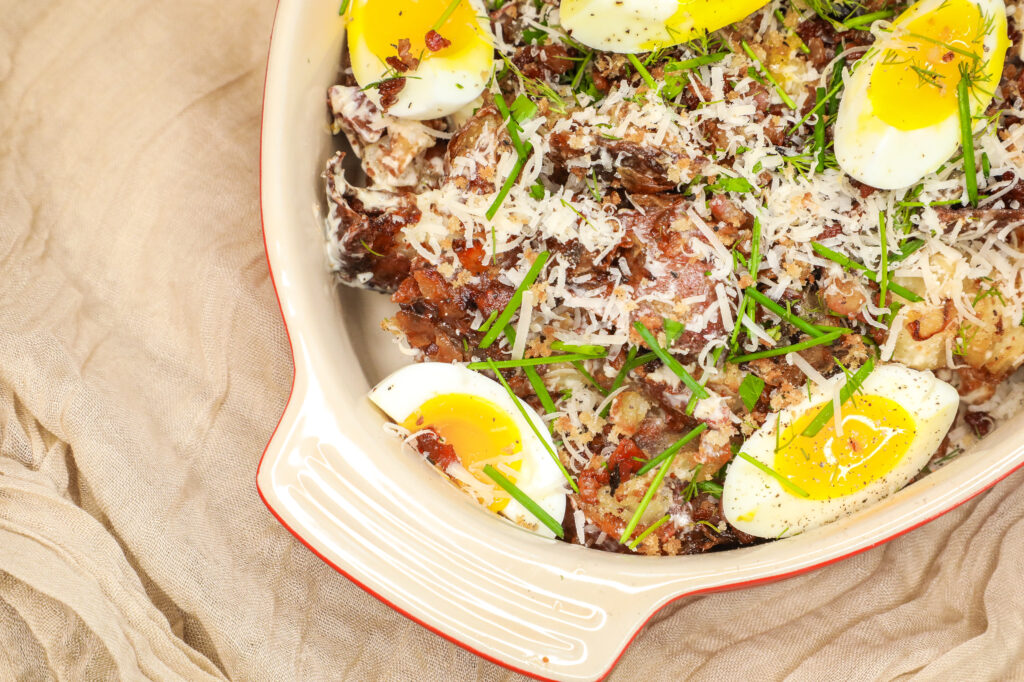
Rounding out our meal, this version of potato salad combines the delightful crispiness of fried potatoes with a refreshingly simple dressing—it’s no wonder my family affectionately calls it “Reunion Potato Salad”. Each bite is a fusion of crunch and bursts of fresh flavor, making it an unforgettable addition to any gathering. In my humble opinion, no potato salad is truly complete without boiled eggs. In this recipe, I feature my favorite way to prepare eggs: soft-boiled with a delightfully jammy interior. Preparation instructions are provided below:

Easiest Soft Boiled Eggs
Ingredients
- 6 Eggs Large
- Ice Cubes
- Water
Instructions
- Fill a medium pot with water, ensuring there is enough water to cover the eggs by about oneinch. Bring the water to a rolling boil over high heat.
- Carefully lower the eggs into the boiling water using a spoon.
- Reduce the heat to a gentle simmer and let the eggs cook for exactly 6 minutes for aperfectly jammy interior.
- While the eggs are cooking, prepare an ice bath by filling a large bowl with ice cubes andcold water.
- Once the eggs are done cooking, immediately transfer them to the ice bath using a slotted spoon or tongs. Let the eggs sit in the ice bath for at least 5 minutes to stop the cooking process and cool them down.
- To peel, gently crack the eggs on a flat surface and roll them with a light touch to loosen the shell. Start peeling at the wider end of the egg, where the air pocket is. Carefully remove the shell, rinsing under cool running water as needed to remove any shell fragments.

Twice Cooked Reunion Potato Salad
Ingredients
- 2.5 Lb Yukon Gold Potatoes
- 1 White Onion Diced
- 1 Shallot Minced
- 2 Tbsp Butter
- 4 Oz Pancetta Diced
- ½ Cup Sour Cream
- 2 Tbsp Dijon Mustard
- 1 Tbsp Red Wine Vinegar
- 1 Cup Parmesan Cheese Finely shredded, plus extra for garnish
- 2 Tbsp Fresh Dill Chopped, plus extra for garnish
- 1 Tbsp Fresh Thyme Leaves removed and chopped, plus extra for garnish
- 1 Tbsp Fresh Parsley Chopped, plus extra for garnish
- 6 Soft Boiled Eggs Ingredient list below
- 1 Tbsp Garlic Powder
- ½ Tbsp Onion Powder
- Salt To taste
- Pepper To taste
Soft Boiled Eggs
- 6 Eggs Large
- Ice Cubes
- Water
Instructions
Twice Cooked Reunion Potato Salad
- Preheat the oven to 400 degrees F.
- Clean the potatoes thoroughly, then pierce each with a fork 2-3 times.
- Place the potatoes on a baking sheet in one even layer, drizzle with olive oil, and sprinklewith salt and freshly ground black pepper.
- Bake the potatoes for 25 to 30 minutes until fork-tender (depending on size).
- While the potatoes are baking, place a frying pan over low heat. Add diced onions and shallots, cooking them slowly until they turn golden brown and sweet. Caramelization occurs when the natural sugars in the onions and shallots break down and develop rich flavors, resulting in a deliciously sweet and savory addition to your dish. Be patient, as this process can take some time, but the results are well worth the wait! Remove the onions and shallots from the pan using a slotted spoon and set aside.
- Using the same pan, add diced pancetta. Cook slowly as the fat renders and the pancetta becomes crispy.
- Save the rendered fat from the pancetta to toast the panko breadcrumbs over medium heat until golden brown.
- Meanwhile, whisk together the mayonnaise, sour cream, red wine vinegar, Dijon mustard, and Parmesan cheese in a large mixing bowl. Stir in the garlic, onion powder, and fresh herbs, reserving some for garnish. Cover and set the mixture aside in the refrigerator to allow the flavors to meld.
- After baking, let the potatoes cool slightly, then use a coffee cup or another heavy, flat object to gently smash each potato into a disc on wax paper or a cutting board.
- In a frying pan, heat a neutral oil over medium high heat and fry the potatoes until they achieve a crispy golden crust. Once cooked, drain them on a rack over a layer of paper towels.
- Add the fried potatoes to the bowl and toss them gently in the dressing.
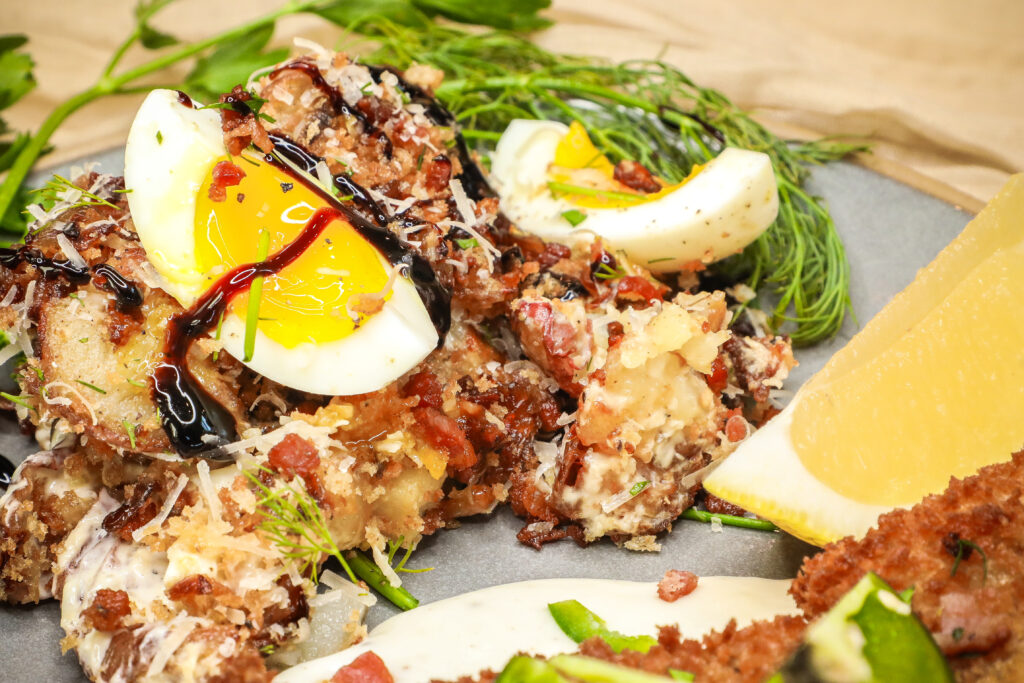
- Arrange the dressed potatoes in a serving dish and garnish with soft-boiled eggs, extra Parmesan, and reserved herbs. If desired, finish with a drizzle of balsamic reduction for the perfect finishing touch.
Soft Boiled Eggs
- Fill a medium pot with water, ensuring there is enough water to cover the eggs by about oneinch. Bring the water to a rolling boil over high heat.
- Carefully lower the eggs into the boiling water using a spoon.
- Reduce the heat to a gentle simmer and let the eggs cook for exactly 6 minutes for a perfectly jammy interior.
- While the eggs are cooking, prepare an ice bath by filling a large bowl with ice cubes and cold water.
- Once the eggs are done cooking, immediately transfer them to the ice bath using a slotted spoon or tongs. Let the eggs sit in the ice bath for at least 5 minutes to stop the cooking process and cool them down.
- To peel, gently crack the eggs on a flat surface and roll them with a light touch to loosen the shell. Start peeling at the wider end of the egg, where the air pocket is. Carefully remove the shell, rinsing under cool running water as needed to remove any shell fragments.
Conclusion
The recipes provided invite you on a delightful journey through vibrant flavors and textures that are guaranteed to wow your guests at any gathering! Imagine the harmony of ingredients in the sautéed cabbage slaw, the twice-cooked Reunion Potato Salad, and the delicious Texas Schnitzel topped with jalapeño bacon cream gravy—each bite a testament to the creativity and care that goes into homemade cooking. This culinary adventure beautifully marries German and Texan flavors, reflecting the rich diversity of New Braunfels, TX, where traditions come together to create unity and celebration.
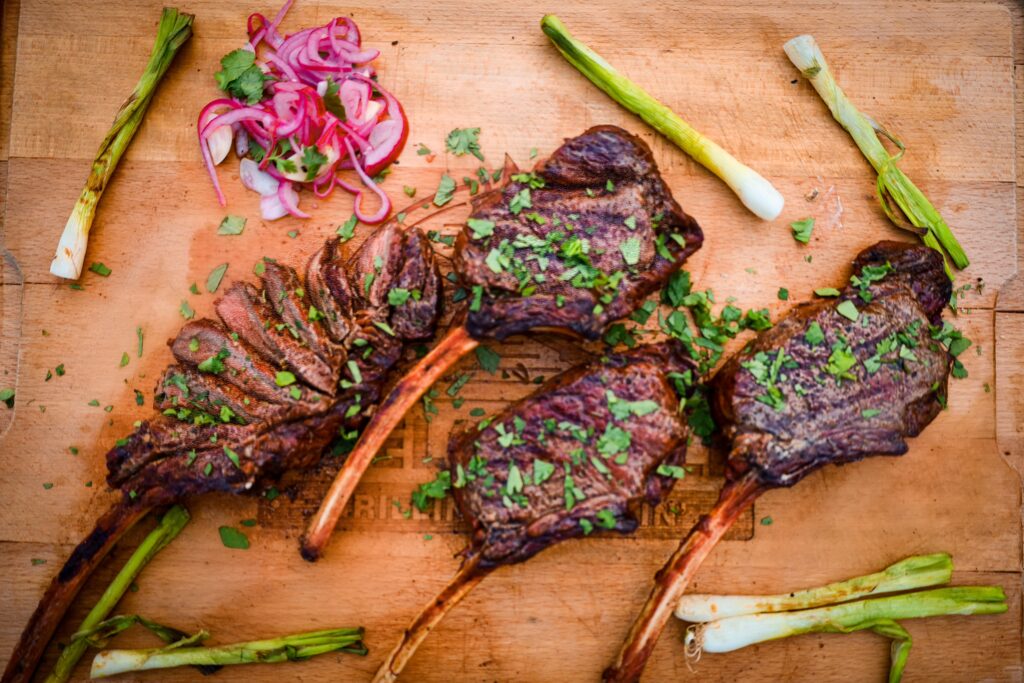
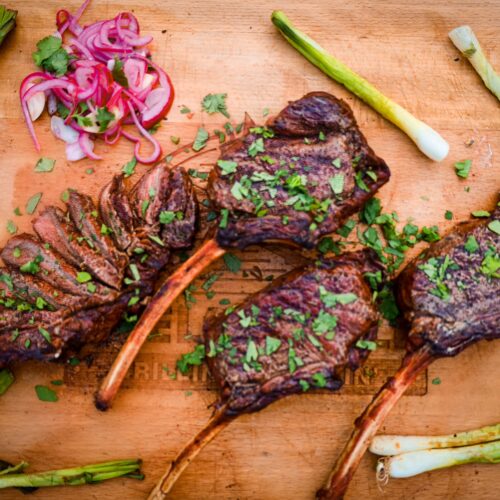
Campfire Cooking with Elk Tomahawk Steaks
Each summer, my immediate family is privileged to enjoy the wonderful experience of gathering with extended relatives at their family’s charming cabin near Gunnison, Colorado. As generations gather here, the cabin has long served as a backdrop for storytelling, sharing, laughter, and reconnection with nature. The Castles are a stunning mountain formation located near Gunnison, Colorado that stand as a testament to Colorado’s rich geological history and untamed mountain spirit, providing an idyllic backdrop for our culinary adventure.


There’s something magical about cooking over an open flame. It’s an essential skill for outdoor enthusiasts and adds an authentic touch to any adventure. Campfire cooking not only connects you with nature but also enhances the flavors of your food. The smoky essence and hands-on approach make every meal a memorable experience. Whether you’re a seasoned camper or a novice, learning to cook over a campfire can truly transform and fuel you for your outdoor adventures.
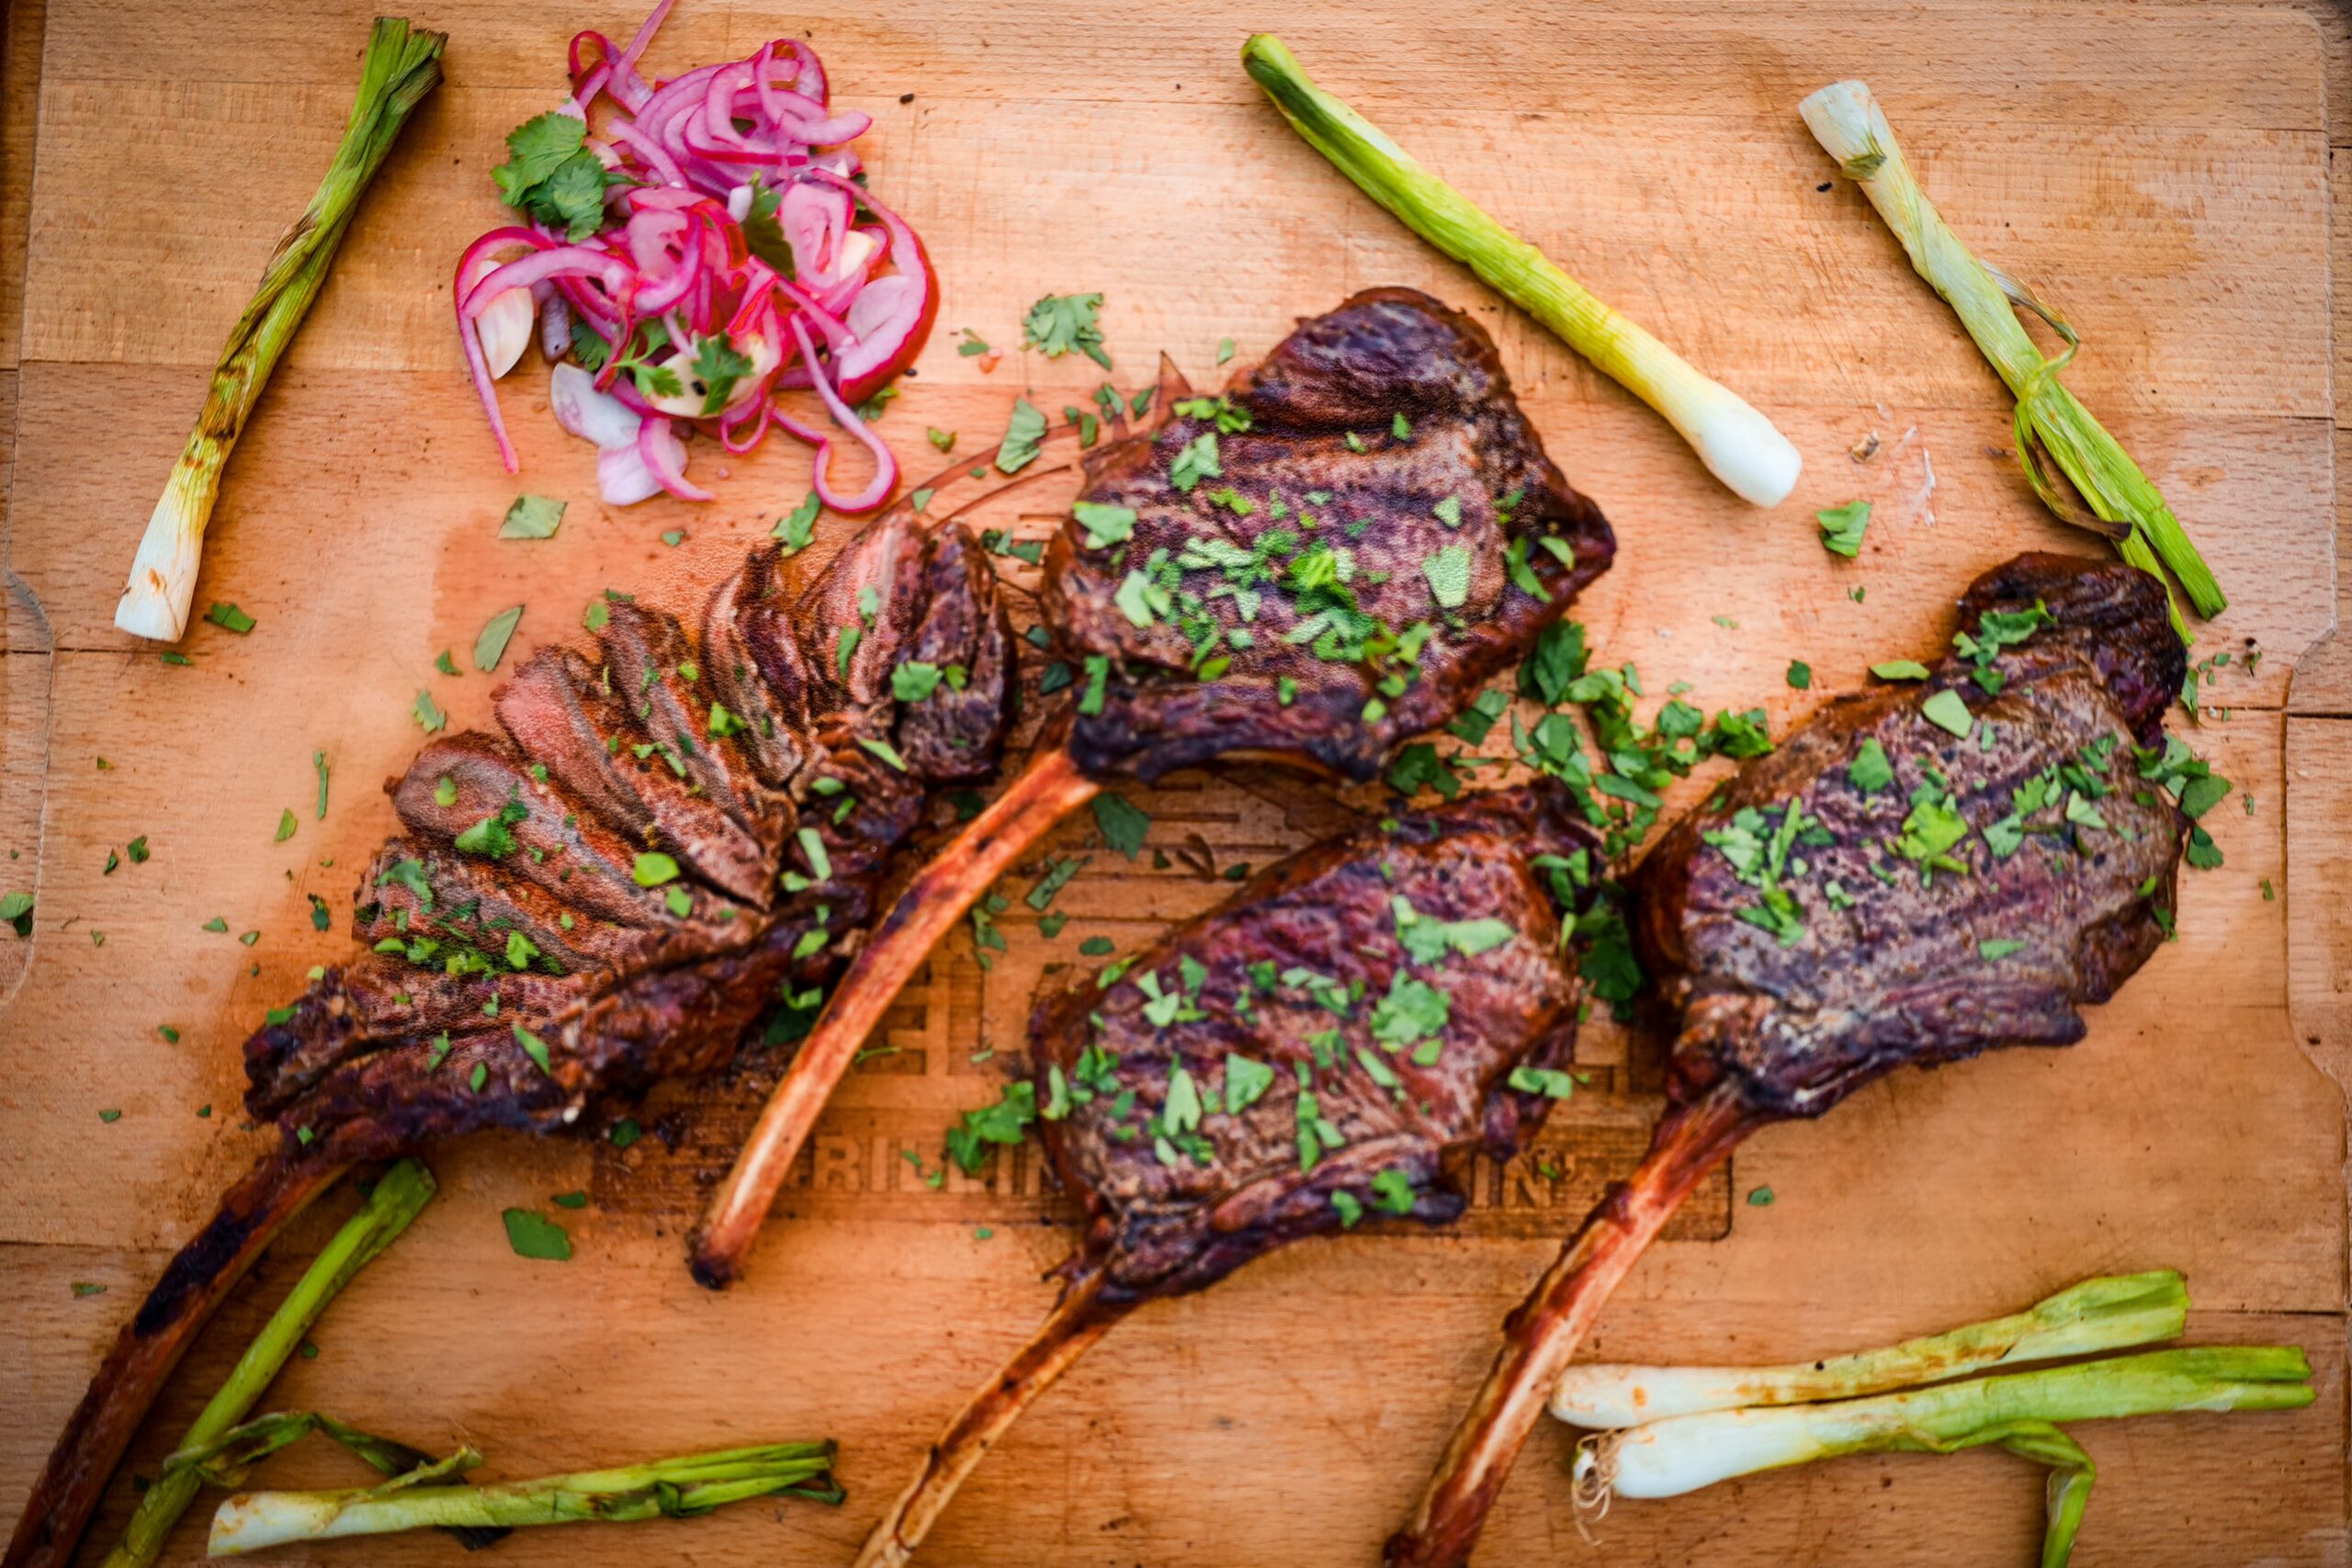
Surrounded by towering mountains and vibrant greenery, the scene was set for a delightful evening of campfire cooking and an unforgettable adventure. Experience the Elk Tomahawk Steak, a flavorful and beautifully presented bone-in ribeye that promises a memorable dining experience. Excitement fills the air as we prepare to ignite the campfire just before golden hour. Join myself and a few of my foodie-loving family members, Josh & Jaclyn Kemp, to learn how to master the art of cooking this savory elk steak and elevate your campfire cooking!

Choosing the Perfect Steak
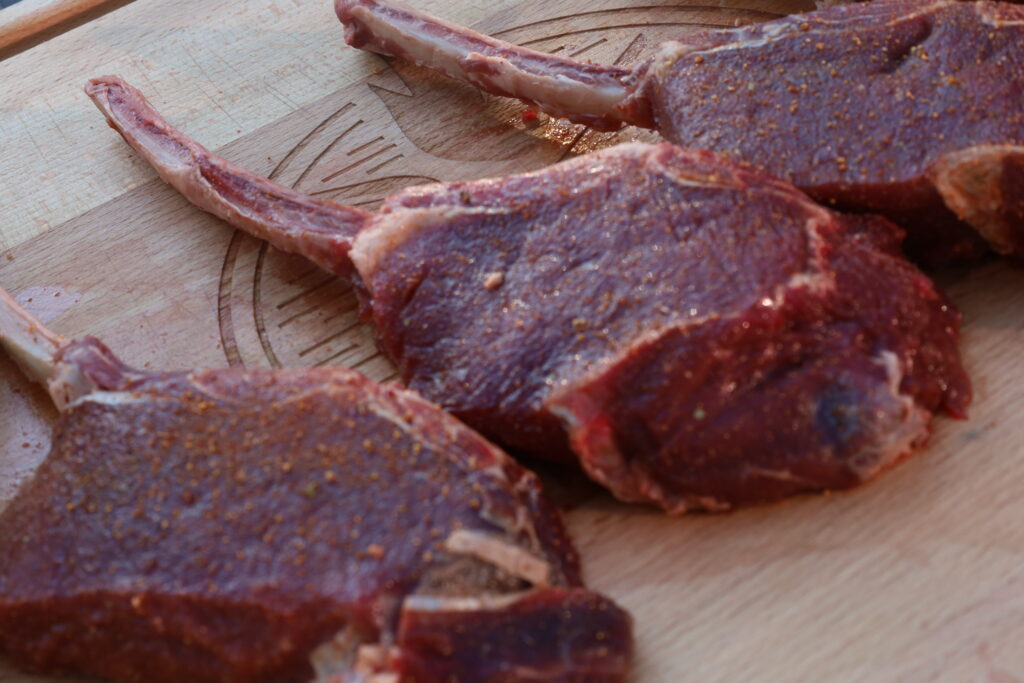
When it comes to wild game, elk meat stands out as a prime choice for its rich and distinctive flavor, making it a favorite among outdoor enthusiasts and culinary aficionados alike. Among the various cuts available, the tomahawk steak is particularly noteworthy; with its long, impressive rib bone and elevated fat content, it not only offers a visually striking presentation but also delivers a deliciously tender bite.
When sourcing elk tomahawk steaks, it’s essential to seek out high-quality suppliers who specialize in wild game to ensure you’re getting the best product available. Specialty butchers and reputable online stores can be excellent places to discover these unique and sought-after cuts.
Keep in mind that the quality of your meat will significantly impact your cooking success, enhancing the flavor and overall enjoyment of your meal. Therefore, take your time to choose wisely; the effort you put into selecting the right steaks will be reflected in the taste and satisfaction of your final outcome. Embrace the adventure of cooking with elk meat and enjoy the unique flavors it brings to your table.
Preparing the Campfire
Choosing the right wood for campfire cooking is essential for optimal flavor and performance. Hardwoods like oak, hickory, maple, and mesquite are preferred as they burn longer and impart rich flavors, while softwoods such as pine and cedar should be avoided due to excessive smoke and resin. Ensure the wood is well-seasoned and free of mold or rot for a safe cooking experience. For example, hickory adds a robust, smoky flavor that enhances dishes like elk tomahawk steaks, making the overall cooking experience more enjoyable.
The foundation of great campfire cooking lies in building the perfect fire. Start by selecting a safe and suitable location with ample ventilation. Gather dry wood, kindling, and tinder to create a robust and steady flame. Arrange your firewood in a teepee or log cabin structure for optimal airflow. Once your fire is established, allow it to burn down to hot coals, providing consistent heat for cooking. Always prioritize safety by keeping a water source and a shovel nearby to manage the fire and extinguish it when necessary.

Essential Tools and Seasonings
To cook elk tomahawk steaks over a campfire, you’ll need some essential tools. A cast-iron skillet, griddle, or grill grate is ideal for even heat distribution and achieving the perfect sear. Long-handled tongs and heat-resistant gloves will protect you from the flames while handling the meat. Don’t forget sturdy utensils and a sharp knife for preparing and serving your meal. Finally, a meat thermometer is crucial for checking the doneness of your steaks without cutting into them.
Elk Tomahawk Steak Recipe
By Josh Kemp
Colorado is home to the largest elk population in the world, with over a quarter million elk roaming its landscapes. Sustainable hunting practices ensure that this incredible meat will grace our tables for generations to come. Cooking elk tomahawk steaks over a campfire requires patience and attention to detail. Follow these steps to ensure a mouthwatering result:
Elk Tomahawk Steak
Ingredients
- 4 Tomahawk Elk Steaks
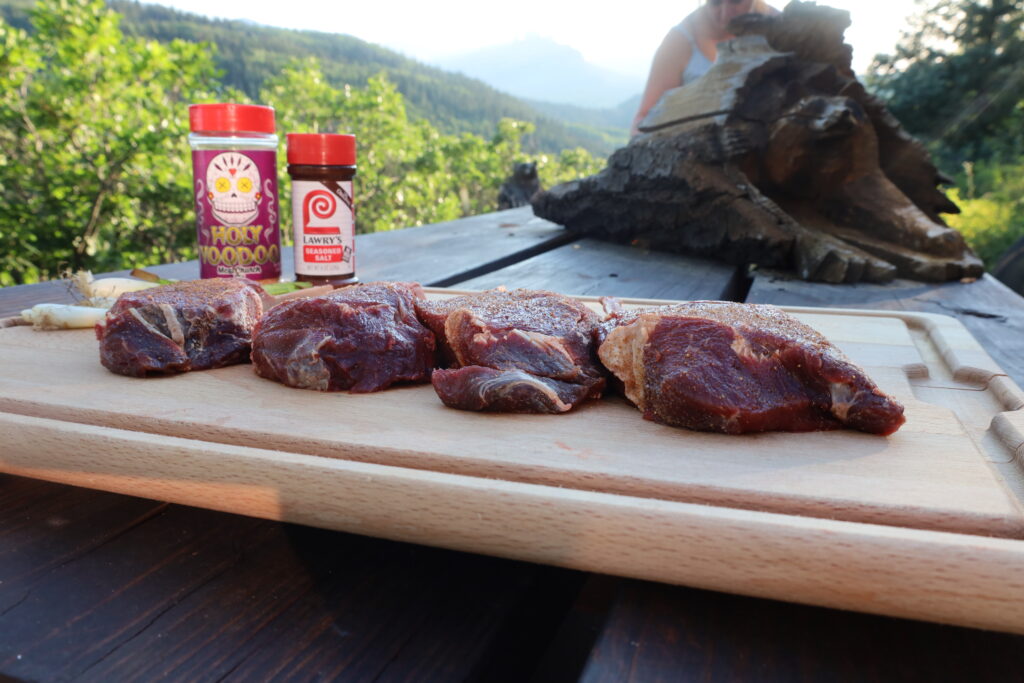
- 2 Tbsp Lawry's Seasoning Salt
- 2 Tbsp Holy Voodoo Spice Blend
- 1 Tsp Black Pepper
Instructions
Thaw elk steaks
- Be sure to thaw steaks one hour prior to cooking if they are frozen. This allows the meat to reach an optimal temperature for cooking, ensuring a more even cook and better flavor. For best results, place the steaks in the refrigerator or a cooler to thaw gradually, rather than using warm water or leaving them at room temperature.
Generously season steaks
- Season with Lawry's seasoning salt, Holy Voodoo spice blend, and freshly cracked black pepper to enhance the flavors. If possible, allow the steaks to rest for about an hour, which helps the seasonings penetrate the meat for a more flavorful outcome.
Cook on indirect heat
- Cook beside the fire for a few minutes on each side to allow the rich, smoky flavor from the wood to infuse the steaks. This method not only helps to enhance the taste but also ensures that the steaks cook evenly without direct exposure to high heat, resulting in a perfectly tender and juicy finish.
Check the temperature
- Using a thermometer, remember to keep a close eye on them to avoid overcooking while still achieving that delicious smoky essence. At roughly 90°s internal, move steaks to direct heat to create crust on both sides, flipping only once. For perfect elk tomahawk steaks, achieving the right internal temperature is crucial to ensure optimal tenderness and flavor.

Rest
- After cooking the steaks to your desired doneness, cover them with aluminum foil and let them rest for about 5 minutes while adding a pat of butter on top of each steak. This resting period allows the juices to redistribute throughout the meat, ensuring each bite is flavorful and tender. Serve the steaks hot, garnished with fresh herbs for an added touch, if desired.
Pairing with the Outdoors
To complement your elk tomahawk steaks, consider pairing them with hearty side dishes. Dutch oven potatoes, seasoned with a blend of aromatic herbs such as rosemary and thyme, are cooked to golden perfection, providing a comforting and savory complement to the rich flavors of the steak. Their crispy exterior and soft interior create a delightful contrast that is sure to please the palate. Additionally, grilled zucchini, charred and bursting with flavor, brings a fresh and healthy element to your meal. When grilled, the zucchini develops a smoky sweetness that enhances its natural taste, making it a perfect side for balancing the richness of the elk.
Recipe for Dutch Oven Potatoes
By Jessy Mattix
Cooking Dutch oven potatoes over a campfire is a delightful way to create a rich and satisfying side dish that pairs beautifully with elk tomahawk steaks. This recipe incorporates a creamy roux combined with a medley of cheeses and fresh herbs for a decadent texture and flavor.
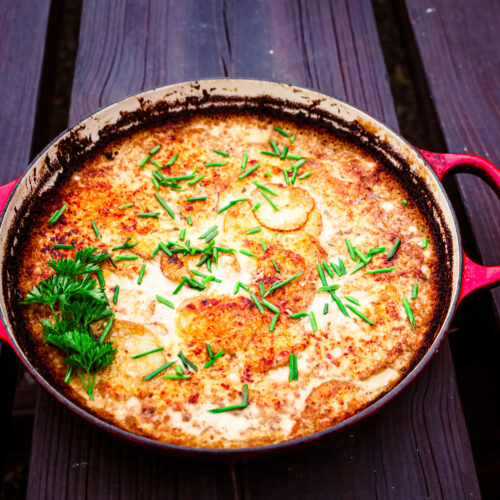
Dutch Oven Potatoes
Ingredients
- 4 Russet Potatoes Medium
- 2 Tbsp Flour
- 1 Tsp Butter
- 1 Tsp Fresh Thyme Chopped
- 1 Tsp Fresh Parsley Chopped
- 1 Cup Heavy Cream
- 1 Cup Smoked Gouda Cheese Shredded
- ½ Cup Gruyere Cheese Shredded
- Salt To taste
- Pepper To taste
Instructions
Prepare the Potatoes
- Place the very thinly sliced russet potatoes in a large bowl, cover with cold water, and season with salt. This helps to remove excess starch and prevents them from turning brown while you prepare the roux.
Make the Roux
- In your Dutch oven, melt the butter over the campfire. Once melted, add the flour and stir continuously to form a smooth paste. Cook for about 2 minutes until it turns a light golden color, which will help deepen the flavor.
Add Cream and Cheese
- Gradually pour in the heavy cream while whisking continuously to avoid lumps. Once combined, stir in the fresh thyme, parsley, smoked gouda, parmesan, and gruyere cheeses until melted and smooth. Season with salt and pepper to taste.
Combine Potatoes and Sauce
- Drain the sliced potatoes and pat dry. Add them to the cheese mixture in the Dutch oven. Arrange the potatoes in a circular pattern, ensuring that each one is evenly coated with the creamy sauce.
Cook Over Campfire
- Cover the Dutch oven with its lid and place it over the campfire. Cook for about 30-40 minutes, stirring occasionally, or until the potatoes are tender and cooked through.
Brown the Top (Optional)
- If available, use a kitchen torch or fire-starter to brown the top of the potatoes for an added layer of flavor and texture. Be careful not to burn them—keep the flame moving to achieve an even golden finish.
Serve
- Once finished, remove the Dutch oven from the heat and let it rest for a few minutes before serving. These Dutch oven potatoes, with their creamy texture and cheesy goodness, will beautifully complement your elk steaks and make for a memorable outdoor dining experience. Enjoy!
Grilled Zucchini with Honey Balsamic & Jamaican Green Sauce
By Jaclyn Barber
Grilled zucchini gets a flavor-packed upgrade with a drizzle of honey balsamic glaze and a side of vibrant Jamaican green sauce. This dish is the perfect blend of smoky, sweet, and tangy flavors that elevate a simple vegetable into a memorable side or light main. It’s easy to make, full of fresh, bold flavors, and a perfect addition to any grill session!
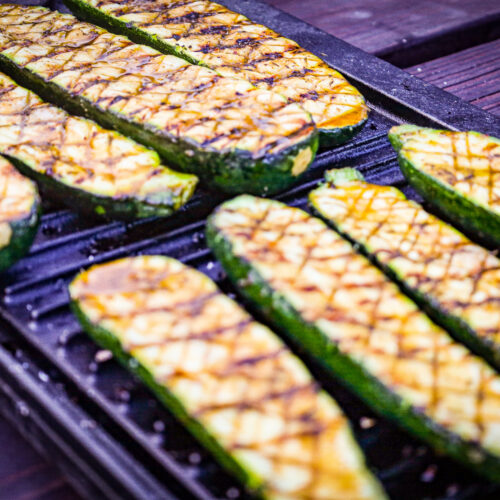
Grilled Zucchini with Honey Balsamic & Jamaican Green Sauce
Ingredients
For the Grilled Zucchini:
- 8 Zucchini Large, sliced in half longways
- 3 Tbsp Olive Oil
- Salt To taste
- Pepper To taste
For the Sauce:
- ¼ Cup Olive Oil
- ¼ Cup Coconut Aminos
- ¼ Cup Honey Balsamic Vinegar
- 2 Tbsp Jamaican Walkerswood Green Seasoning
- ¼ Tsp Garlic Salt
- Fresh Ground Pepper To taste
For the Garnish (optional):
- Crispy Shallot
Instructions
Prepare Sauce
- Begin by combining all the sauce ingredients—such as fresh herbs, garlic, balsamic vinegar, and honey.
- Whisk the mixture until it reaches a smooth and creamy consistency, then set it aside to allow the flavors to meld together.Hint: You can pre-make this in a food processor and seal in an airtight container before you hit the great outdoors.
Prepare Zucchini
- Take each zucchini and carefully cut it in half lengthwise, ensuring you create even halves for even cooking.
- Sprinkle salt on the cut sides of the zucchini to draw out some of the moisture. Hint: If you have the time, this extra step helps enhance the flavor and texture. Let the zucchini sit for about 15 minutes before rinsing and patting them dry. If you're short on time, you can skip the salting step and proceed to make crosshatch cuts down the inside halves of each zucchini.These cuts will help the flavors penetrate better while cooking.
- After that, rub each half generously with olive oil, and season with salt and freshly cracked pepper to taste.
Time to Grill
- Preheat your grill to medium-high heat and place the zucchini on the grill with the flat side down.
- Grill your zucchini until they reach your desired level of tenderness or char (typically about 4-5 minutes), then carefully flip them over to cook the other side for an additional 2-3 minutes.
Finishing Touches
- Once the zucchini is perfectly grilled, remove them from the grill and immediately brush the flat sides with the honey balsamic and Jamaican green sauce. This adds a delightful sweetness and tang that complements the smoky flavor of the zucchini.
- Garnish the grilled zucchini with crispy shallots for added crunch and flavor. Serve immediately while they're warm and enjoy the delicious blend of tastes and textures.
Conclusion
Cooking elk tomahawk steaks over a campfire offers a unique blend of adventure and gourmet delight. Campfire cooking is more than just a meal; it’s a shared experience that brings people and recipes together. The joy of cooking, eating, and bonding around a fire creates lasting memories.
We invite you to join fellow food enthusiasts share your own campfire cooking adventures and recipes with our foodie community. Your stories and photos can inspire others to explore new culinary heights in the wild. Happy grilling!
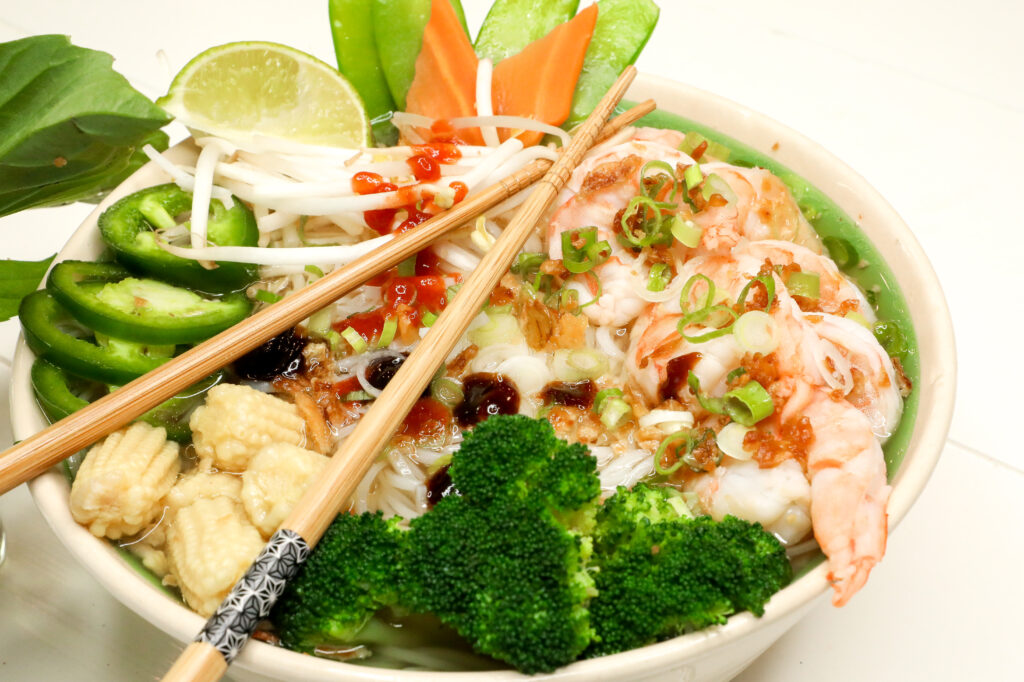
Shrimp Pho: Discovering the Heart of Vietnam in Your Kitchen
The Rich Tapestry of Vietnamese Cuisine
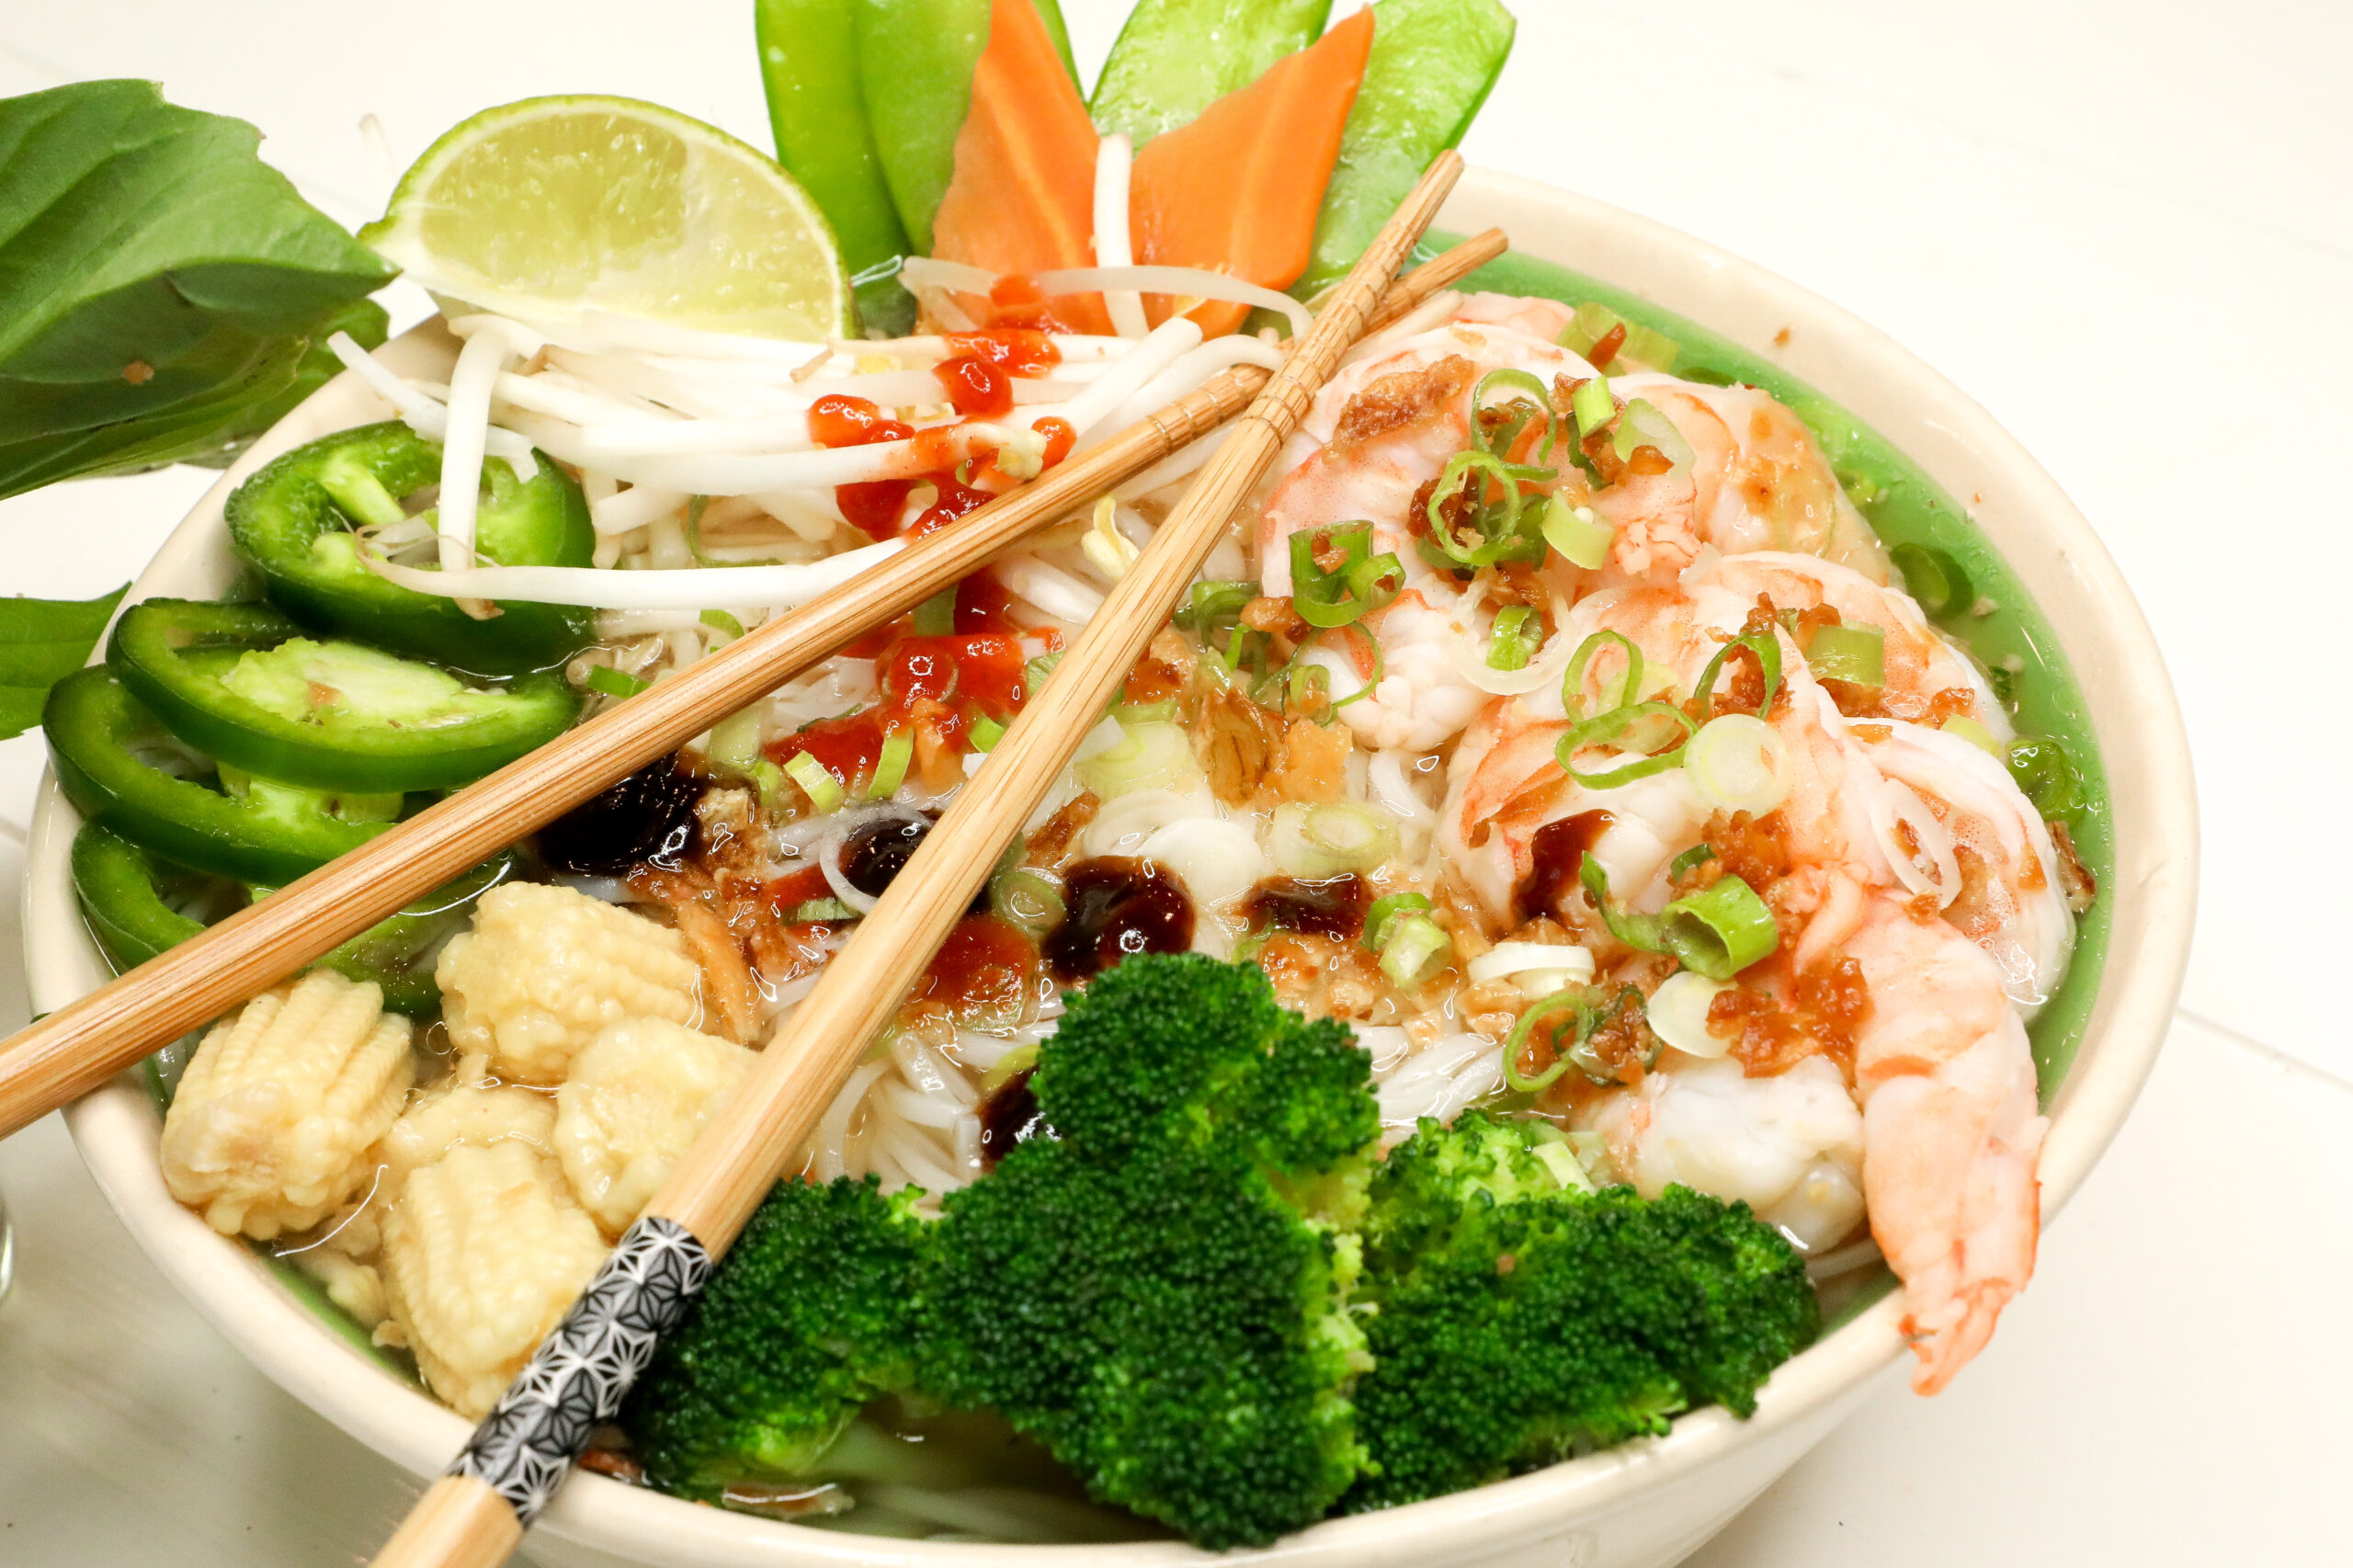
Vietnamese cuisine is a treasure trove of flavors, celebrated for its vibrant ingredients and intricate balance of tastes. Among its many delicious offerings, Pho stands out as one of the most beloved dishes. This aromatic shrimp pho, traditionally made with a flavorful broth, tender noodles, and a variety of meats or seafood, carries a rich cultural history that reflects the heart and soul of Vietnam. Its diverse range of ingredients, including fresh herbs, spices, and vegetables, not only contribute to its unique taste but also make it a nourishing and satisfying meal.
Exploring the Cultural Significance of Shrimp Pho
Pho has transcended borders, becoming both a domestic favorite and a global culinary sensation that captivates the taste buds of food lovers everywhere. If you’ve always wanted to explore authentic Vietnamese flavors from the comfort of your kitchen, this comprehensive guide to making shrimp Pho is just what you need. It will walk you through each step, from preparing the fragrant broth to garnishing with zesty lime and homemade hoisin and sriracha, ensuring you create a delicious bowl of Pho that brings the essence of Vietnam right to your dining table.
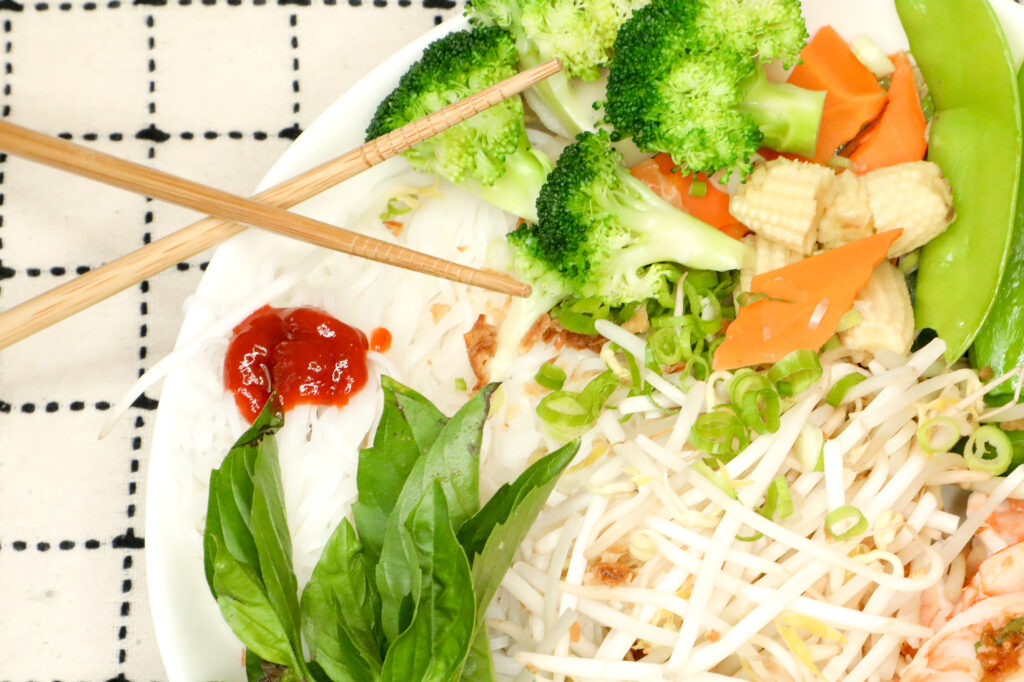



Crafting the Perfect Shrimp Pho Broth
The broth is the heart and soul of Pho. Traditionally simmered for hours, it combines beef bones, spices like star anise and cinnamon, and fish sauce to create a rich, flavorful base. For our shrimp Pho, we will craft a rich seafood broth infused with a medley of aromatics such as ginger, garlic, and star anise. This careful combination will not only elevate the broth’s flavor but also create a complex and satisfying depth that complements the tender shrimp and fresh herbs. Each spoonful will be a delightful journey through a vibrant tapestry of tastes, making our Pho a truly memorable culinary experience.
Rice Noodles: The Perfect Partner to the Broth
Rice noodles are essential to Pho, offering a delicate texture that complements the robust flavors of the broth. These noodles are typically thin and flat, absorbing the soup’s essence while providing a satisfying chewiness.
Personalizing Your Shrimp Pho with Toppings
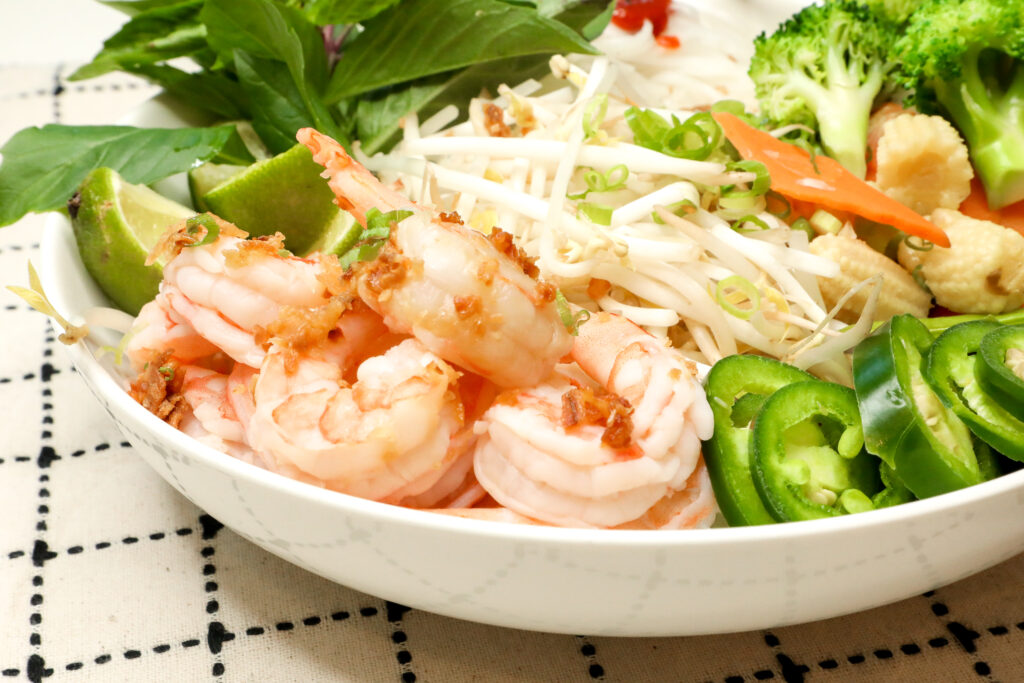
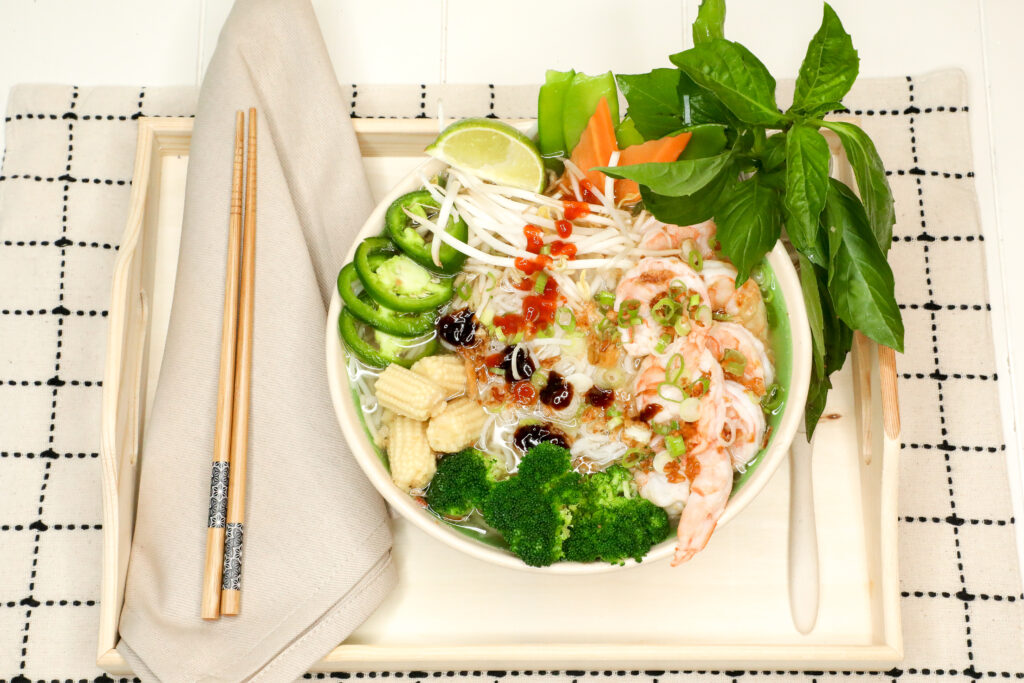
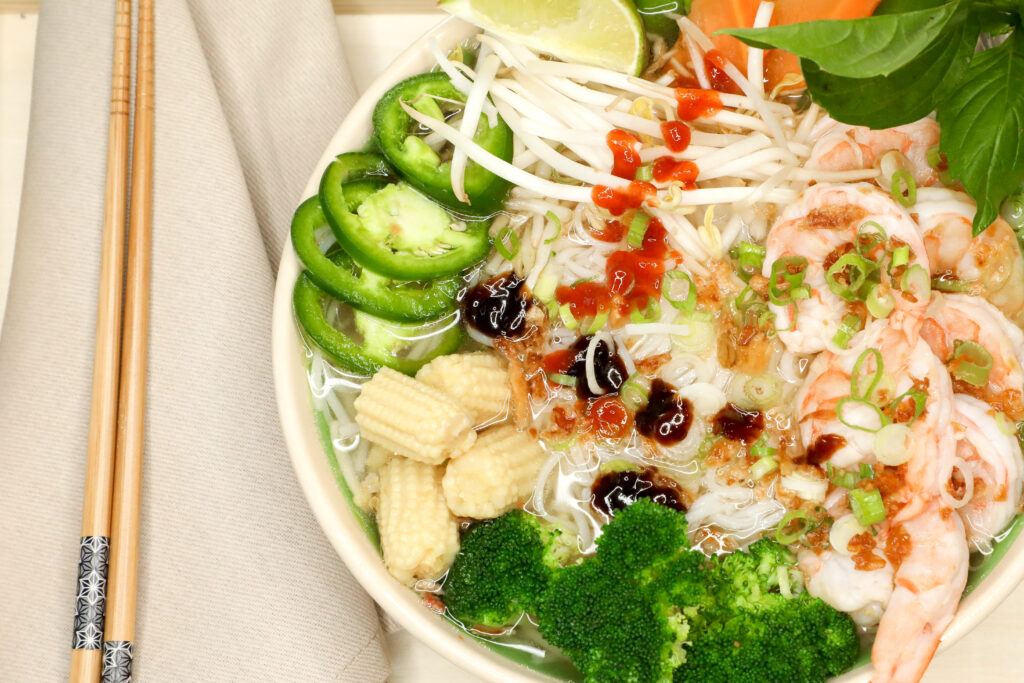
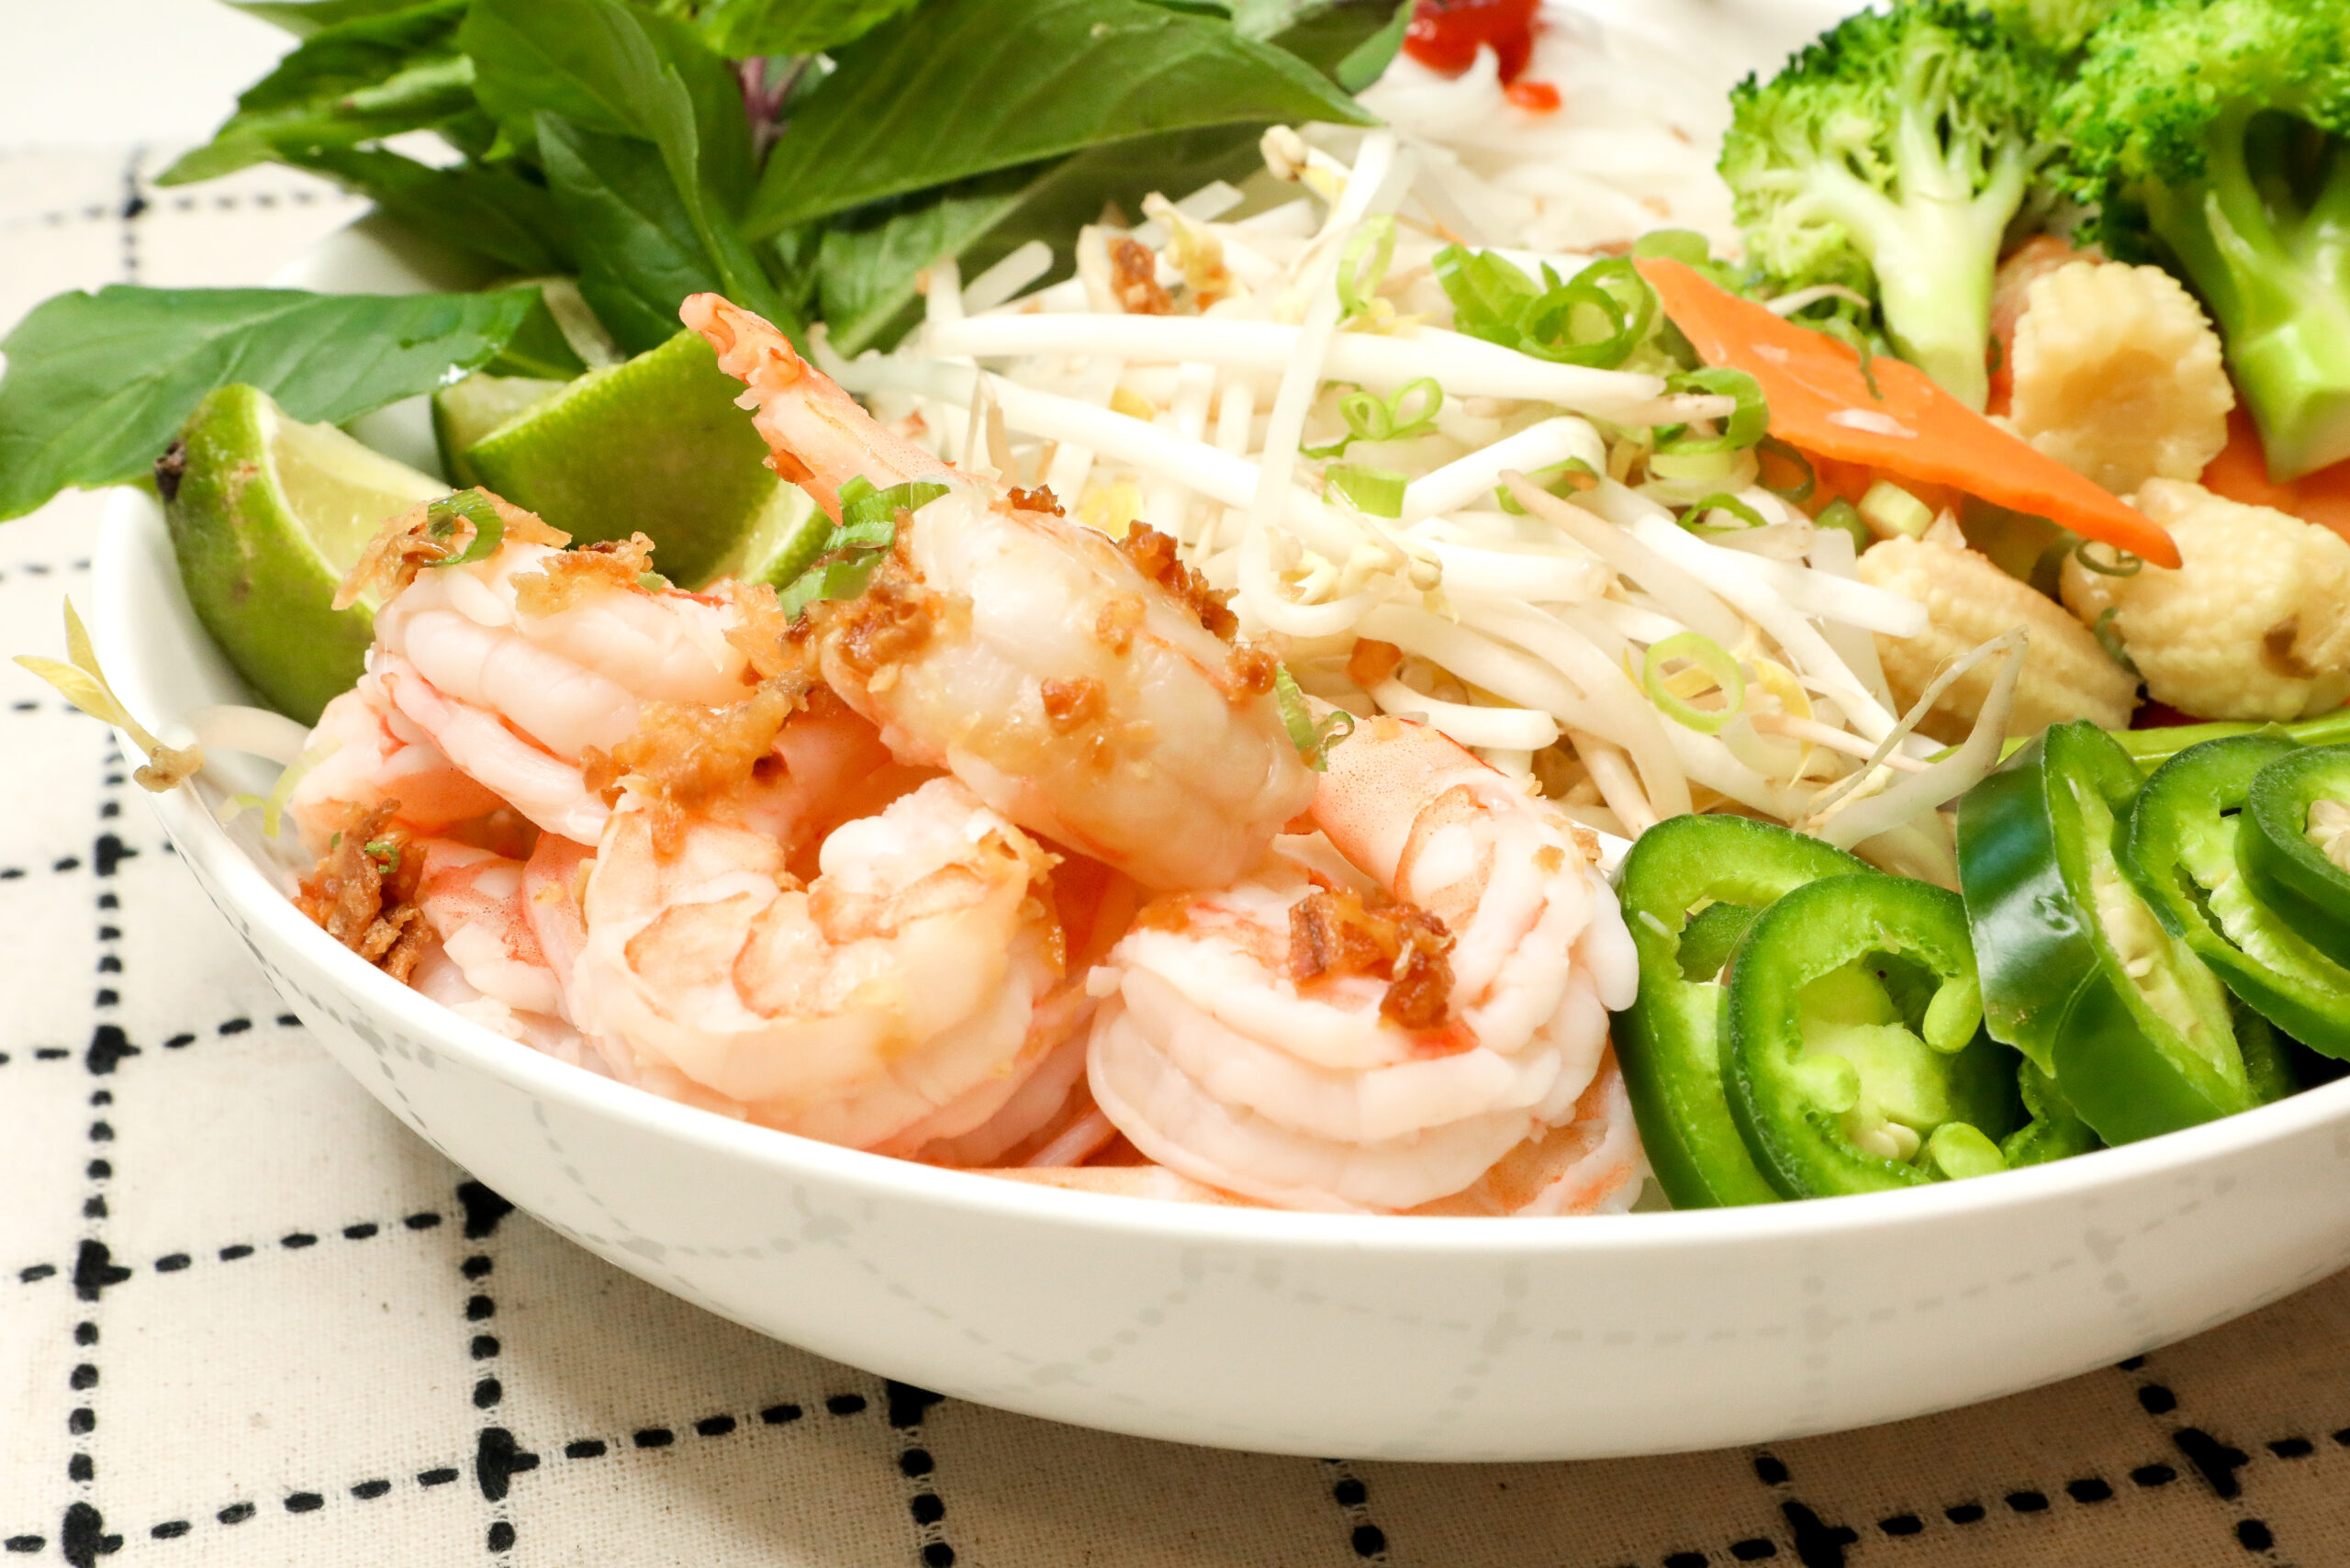
Toppings are where Pho gets personal. Common additions include thinly sliced meats, fresh herbs like Thai basil, cilantro, and mint, as well as crunchy bean sprouts and lime wedges. For shrimp Pho, we’ll add succulent shrimp, jalapeños for a kick of heat, and a variety of vegetables like broccoli, carrots, snap peas, baby corn, and green onions.
Creating Shrimp Pho at Home: Step-by-Step Guide
Now that we’ve thoroughly explored the essential ingredients that make shrimp Pho truly special, let’s dive into the step-by-step process of creating this delicious dish right in your kitchen. This aromatic soup is not only comforting but also bursting with authentic Vietnamese flavors that will transport your taste buds straight to Vietnam. Follow these detailed instructions carefully to craft a rich and flavorful bowl of Pho that’s brimming with the essence of fresh herbs, spices, and perfectly cooked shrimp. You’ll be delighted by the satisfying experience of making this classic dish from scratch!
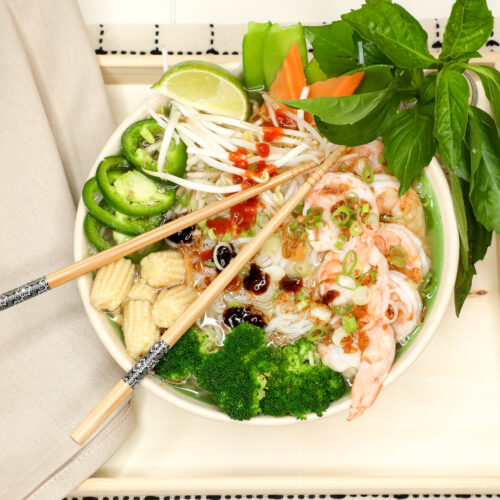
Shrimp Pho
Ingredients
For the Broth:
- 2 Cups Shrimp Shells
- 3 Tbsp Fish Sauce
- 4 Cloves Garlic Minced
- 1-inch Piece of Ginger Sliced
- 2 Star Anise
- 2 Cinnamon Sticks
- 8 Cups Water
For the Noodles:
- 8 Oz Rice Noodles
For the Vegetables:
- 1 Cup Broccoli Florets
- 1 Cup Carrots Thinly Sliced
- 1 Cup Snap Peas
- 1 Cup Baby Corn Cut into bite-sized pieces
For the Shrimp:
- 1 Lb Shrimp Peeled and deveined
- 1 Tbsp Paprika
- Salt and Pepper to Taste
- 2 Tbsp Oil For sautéing
For Garnishing:
- Sliced Jalapenos
- Lime Wedges
- Thai Basil Leaves
- Mung Bean Sprouts
- Chopped Green Onions
Instructions
Step 1: Prepare the Broth
- Char the AromaticsStart by heating a heavy-bottomed pot over medium-high heat. Add the onion and ginger, charring them until they are partially blackened on each side. Then, introduce the whole spices to the same pan and toast them until fragrant, as this process releases their essential oils and intensifies the broth's flavor profile. Next, lower the heat to medium and add the shrimp shells (note: use the shells from the shrimp used in step four) along with minced garlic, sautéing for an additional 2 minutes. Incorporate the shrimp shells and toast them until they turn a light pink and emit a seafood aroma, about 3-4 minutes. This step is vital as it enhances the umami flavor of the broth, creating a richer base for your dish. Once the garlic is fragrant, proceed to step two.
- Build the BrothPour in the fish sauce and 8 cups of water. The fish sauce adds depth and a savory note, while water acts as the base for your broth. Increase heat to high.
- SimmeringBring the mixture to a rolling boil, then reduce the heat to a gentle simmer. This slow cooking process allows the flavors to meld beautifully. Let it simmer for at least 2 hours; the longer you simmer, the more complex and flavorful your broth will become.
- Strain and ReserveAfter simmering, strain the broth through a fine mesh sieve into a bowl, discarding the solids. This leaves a clear, aromatic broth that serves as the essence of your pho.
Step 2: Cook the Noodles
- Boil WaterIn another pot, bring water to a boil. This step must be done in a separate pot to prevent the starch from the noodles from clouding your broth.
- Cook the Rice NoodlesAdd the rice noodles and cook according to the package instructions (usually 5-7 minutes). Stir occasionally to prevent sticking. Cooking the noodles separately ensures they maintain their integrity and texture, which contributes to the overall mouthfeel of the dish.
- Drain and RinseOnce cooked, drain the noodles and rinse them under cold water. This halts the cooking process and removes excess starch, preventing the noodles from clumping together. Set them aside for later assembly.
Step 3: Prepare the Vegetables
- Cut the VegetablesChop the broccoli into small florets, slice the carrots into thin rectangular pieces, and drain the baby corn. To prepare snap peas, use a sharp knife to trim off the stem ends of each snap pea. Some varieties of snap peas may have a string along the seam. If desired, you can gently pull the string away from the pod to enhance the eating experience. However, many people enjoy snap peas whole and find them tender enough to eat without string removal. Once prepared, the snap peas will add a delightful crunch and fresh sweetness to your shrimp Pho, perfectly complementing the other ingredients.
- Blanching Bring a pot of water to a boil and add the chopped vegetables. Blanch them for 2-3 minutes until their colors are vibrant and texture is tender-crisp. Blanching helps retain the color and nutritional value while also ensuring they are cooked perfectly without becoming mushy.
- Drain and Set AsideDrain the vegetables and immediately transfer them to an ice bath (a bowl of ice water). This locks in their bright colors and crisp texture, enhancing the visual appeal of your pho.
Step 4: Cook the Shrimp
- Prepare the ShrimpUsing a paper towel dry the shrimp very well on each side. Season with salt, pepper, to taste and paprika for color.
- Heat the OilIn a large skillet, heat 2 tablespoons of oil over medium-high heat. A hot pan is key to achieving a beautiful sear on the shrimp.
- Sauté the ShrimpAdd the peeled and deveined shrimp in a single layer. Cook for 2-3 minutes on each side until they turn pink and opaque. This quick cooking method ensures the shrimp remain juicy and tender. Overcooking will result in a rubbery texture.
- Set AsideRemove the shrimp from the skillet and set aside. This keeps them warm while preparing the final assembly.
Step 5: Assemble the Pho
- LayeringIn a large bowl, place a generous portion of the cooked rice noodles at the bottom. This forms the base of your dish and allows the flavors to build as you add other ingredients.
- Add the Vegetables and ShrimpNeatly arrange the blanched vegetables and sautéed shrimp on top of the noodles. This layering not only creates an attractive presentation but also allows each ingredient to shine.
- Pour the BrothCarefully ladle the hot seafood broth over the noodles, vegetables, and shrimp. The hot broth will warm the ingredients and meld the flavors beautifully.
- GarnishFinally, adorn your pho with sliced jalapeños for a kick, lime wedges for brightness, Thai basil leaves for aromatic freshness, mung bean sprouts for crunch, and chopped green onions for a burst of flavor. These garnishes add depth and complexity to each bite, elevating your pho experience.
Crafting Your Own Sriracha Sauce
Attention, spice enthusiasts! Crafting sriracha sauce at home is simpler than you might imagine. This zesty, fiery sauce pairs perfectly with your Pho. Sure, you can grab it at the supermarket, but where’s the fun in that? Making your own sriracha sauce not only allows you to control the ingredients, but also ensures that preservatives and extra components are left out. By selecting fresh ingredients, you can create a robust sauce that highlights the natural flavors of each component. The absence of artificial preservatives means you can enjoy a fresher and healthier condiment, while the customizable heat level lets you adjust the spiciness to suit your preference. It is the perfect pairing for your pho and many other dishes.


Easy Homemade Sriracha Sauce
Ingredients
- 1 Lb Red Jalapeños Stemmed and chopped
- ½ Lb Red Bell Peppers Stemmed and chopped
- 1 Head Garlic Peeled
- ¼ Cup Apple Cider Vinegar
- 2 Tbsp Sugar
- 1 Tbsp Salt
Instructions
- Blend the peppers and garlic:In a blender or food processor, add your peppers and garlic. Blend until the mixture becomes smooth.
- Prepare the sauce:Transfer the blended mixture to a saucepan. Stir in the vinegar, sugar, and salt until well combined.
- Simmer the mixture:Place the saucepan on low heat and simmer the mixture for 5-10 minutes, stirring occasionally.
- Cool and blend again:Remove the saucepan from heat and allow the mixture to cool completely. Once cooled, blend the mixture again until smooth.
- Strain the sauce:Using a fine-mesh sieve, strain the sauce to remove any solids for a smoother consistency.
- Store and refrigerate:Pour the strained sauce into a jar or airtight container. Store your homemade sriracha in the refrigerator.
Notes
Elevate Your Pho with Homemade Hoisin Sauce Garnish
You’ve crafted your own sriracha, but why stop there? Consider experimenting with hoisin sauce next! With its unique sweet and savory profile, hoisin adds a rich depth of flavor to your pho, elevating the dish to new heights. Plus, making hoisin sauce at home is both simple and rewarding. You can customize the ingredients to suit your taste, ensuring it perfectly complements your culinary creations.
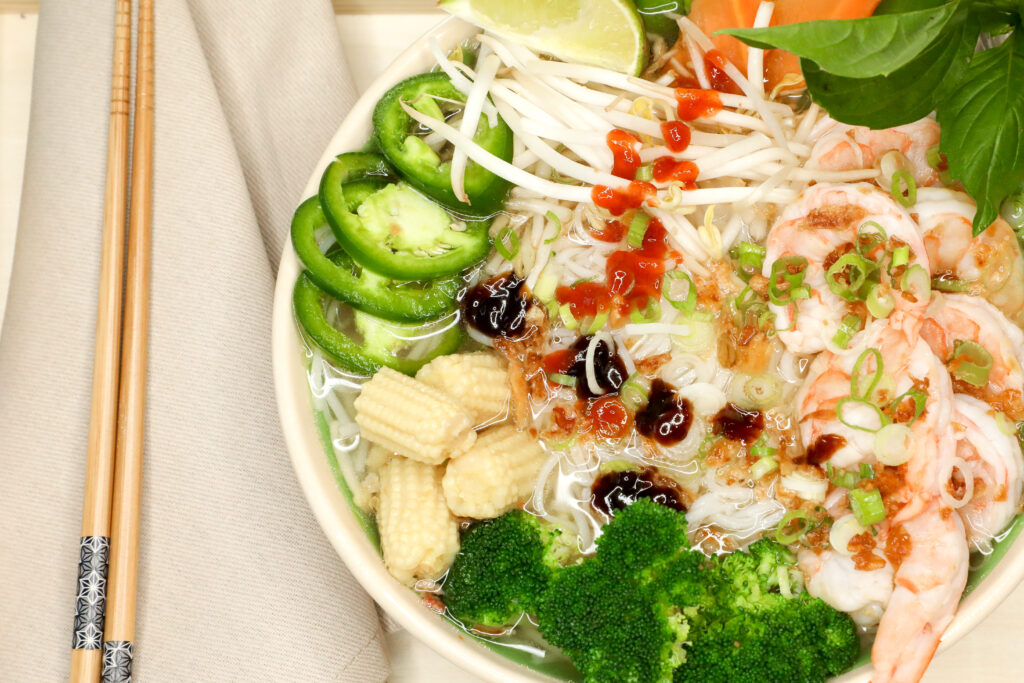

Easy Homemade Hoisin Sauce
Ingredients
- ¼ Cup Soy Sauce
- 2 Tbsp Peanut Butter
- 1 Tbsp Molasses
- 1 Tbsp White Vinegar
- ¼ Tsp Garlic Powder
- 2 Tsp Sesame Oil
- ¼ Tsp Sriracha Sauce
Instructions
- Combine all the ingredients in a bowl and whisk until smooth. Adjust the flavors to your preference.
The Joy of Crafting Shrimp Pho at Home
Making shrimp Pho at home is more than just preparing a meal; it’s an adventure that brings the rich traditions of Vietnamese cuisine into your kitchen. From selecting fresh ingredients to crafting your own sauces, each step enhances your appreciation for this beloved dish. This extravagant approach to Pho not only emphasizes the importance of each technique but also showcases the beauty of combining textures and flavors, creating a truly satisfying dish that celebrates the art of cooking. Savor not just the act of eating, but also the joy of crafting your culinary masterpiece!
Explore, Create, and Share
Remember, the joy of cooking lies in exploration and creativity. Don’t hesitate to experiment with different ingredients and flavors to make the dish your own. For more tips and personalized guidance, connect with our growing community of food enthusiasts and submit your own recipes here.
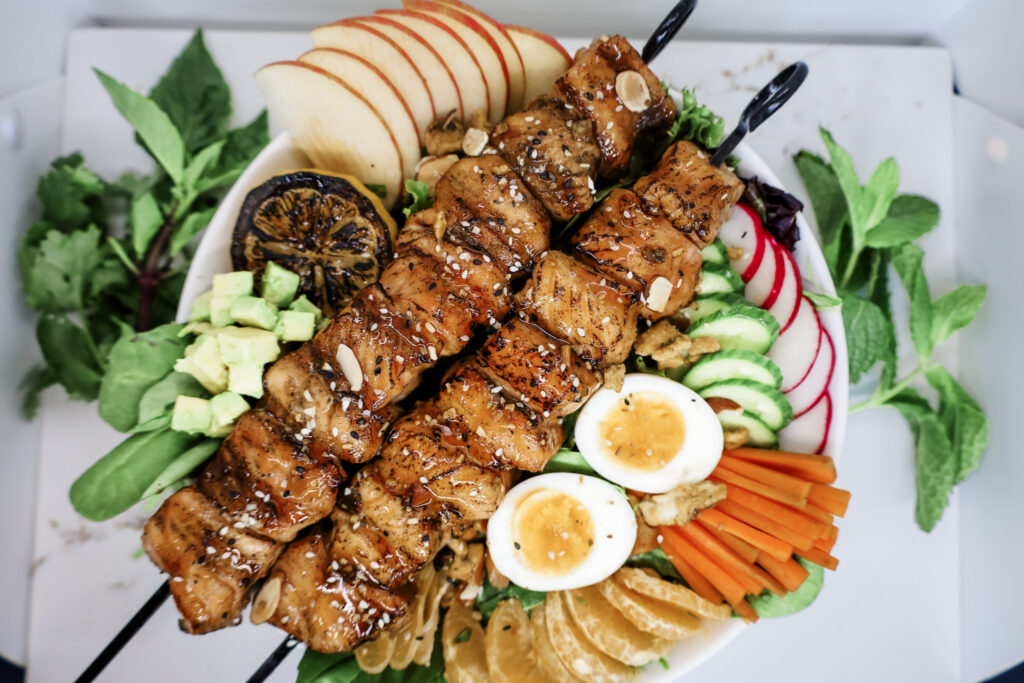
Sizzling Summer Salmon Skewers
Kickstart Summer with Salmon Skewers and Salad
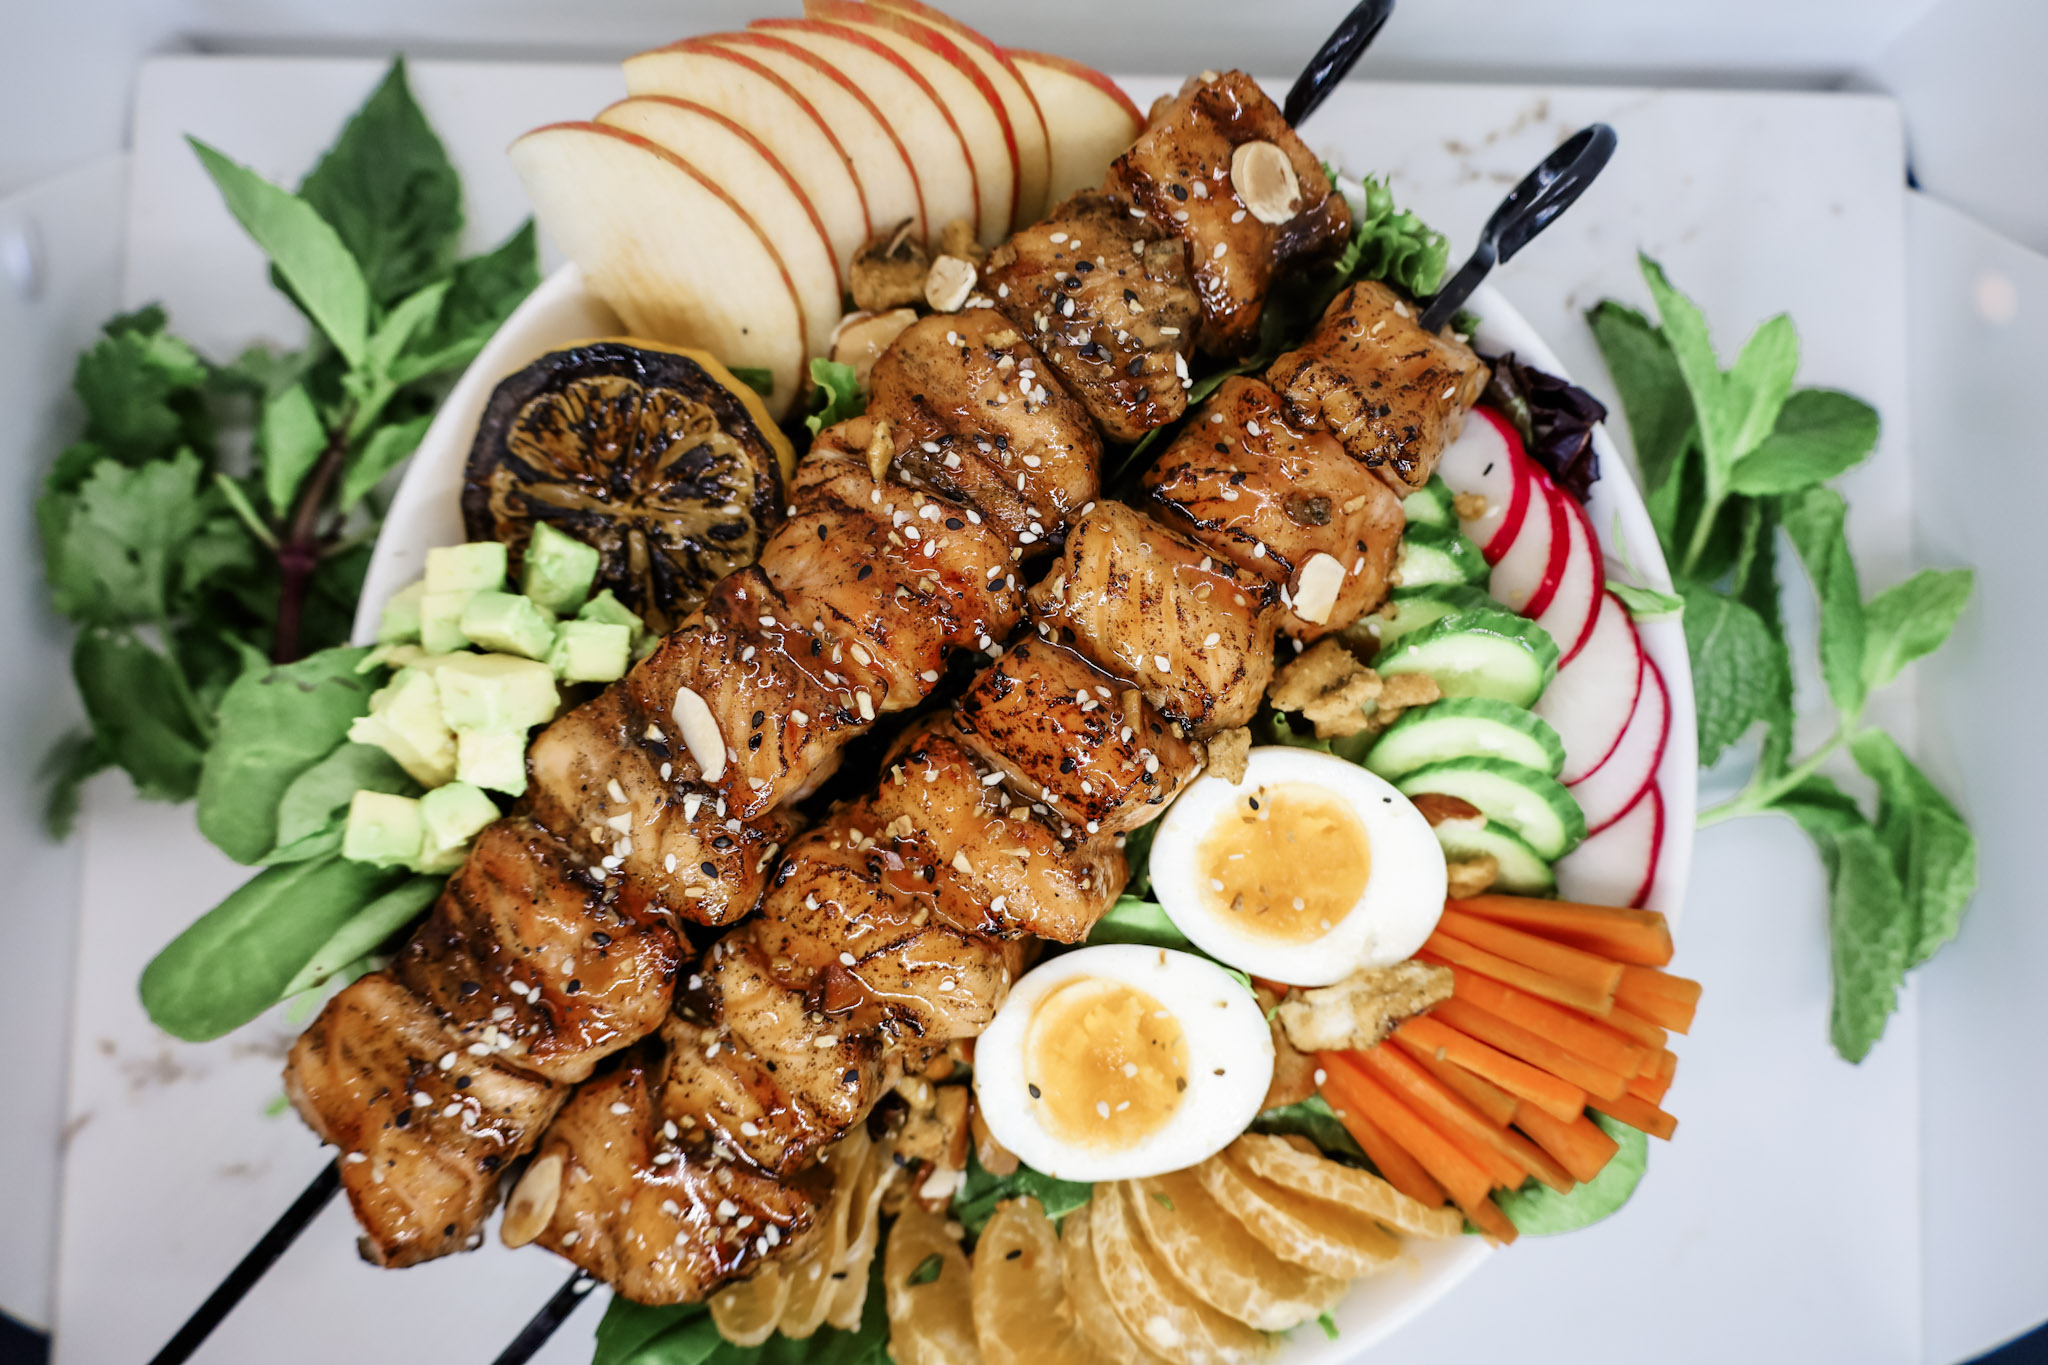
Summer is in full swing, making it the perfect season to fire up the grill. and indulge in mouthwatering recipes. Discover our unique take on salmon skewers paired with a refreshing summer salad. Join us as we guide you through crafting this delectable meal, blending a medley of flavors, textures, and aromas. Whether you’re hosting a backyard barbecue or enjoying a quiet evening at home, this recipe promises to be a hit. The combination of sweet, savory, and slightly spicy flavors makes it perfect for those warm summer nights.
Brining the Salmon for Flavorful Perfection
To begin, we will brine the salmon in a delightful mixture of soy sauce and brown sugar, allowing the rich flavors to permeate the fish. Next, we will prepare a sticky glaze for the salmon and a vinaigrette for dressing. We will then skewer the salmon and grill it while basting with the glaze.
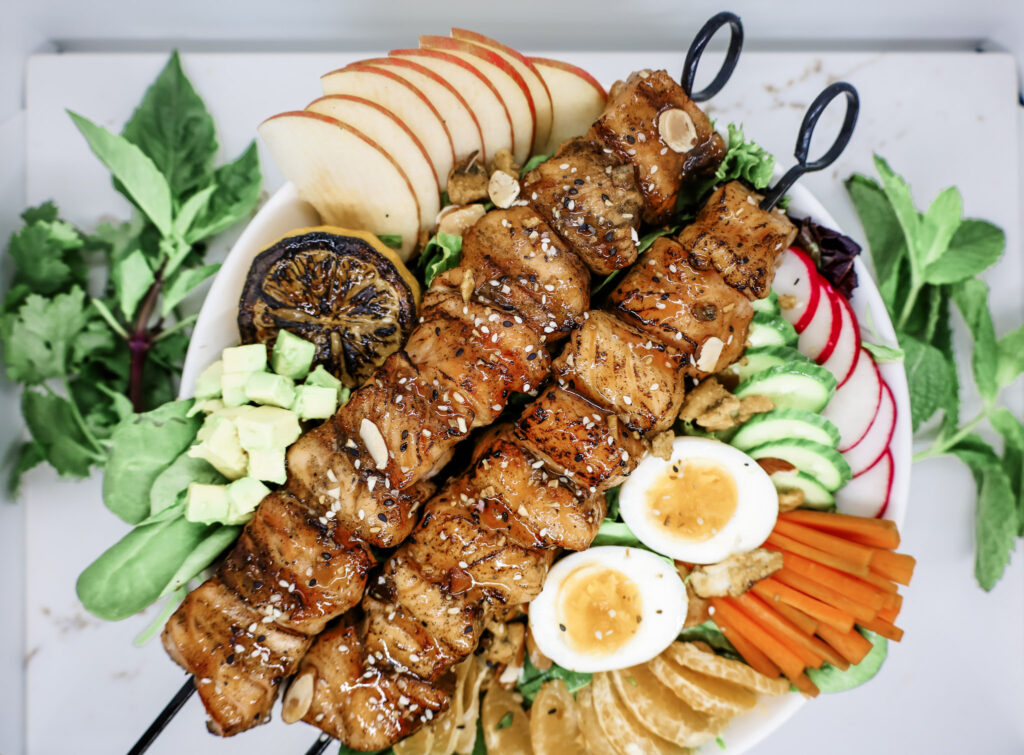
Crafting a Crisp Summer Salad
While the skewers are grilling to perfection, we’ll prepare a crisp summer salad featuring mixed greens, tangerines, thinly sliced apple, cucumbers, and an Asian inspired vinaigrette dressing that complements the savory salmon beautifully. This salad not only adds a refreshing element to the
meal but also balances the rich and robust flavors of the skewers.
Grilling Tips for Perfect Salmon
We’ll also share tips on grilling techniques to achieve perfectly cooked salmon with a slightly charred exterior and a tender, flaky interior. By the end of this article, you’ll have all the knowledge you need to create a summer feast that’s sure to impress your family and friends.
Let’s Get Grilling!
So, grab your grilling tools, gather your ingredients, and let’s embark on this culinary adventure together!
Step 1 – Brining for Perfect Salmon
Why Brine?
Brining the salmon is a crucial step to ensure it’s juicy and flavorful. By soaking the fish in a simple saltwater solution, brining changes the fat on a molecular level, resulting in a more tender texture. This process not only enhances the moisture retention but also infuses the salmon with a subtle seasoning, making each bite exceptionally delicious. Whether you’re grilling, baking, or pan searing, taking the time to brine your salmon will elevate your dish to a new level of culinary excellence.
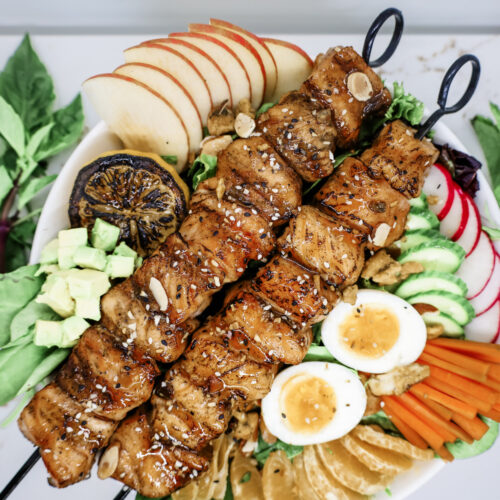
Brining for Perfect Salmon
Ingredients
- 2 Lbs Center Cut Salmon 2 lbs or ½ lbs per serving
Cut salmon into 1 inch cubes
- 5 Cups Filtered Water
- 3 Tbsp Kosher Salt
- 2 Tbsp Soy Sauce Or tamari or coconut aminos
- 2 Tbsp Brown Sugar
Instructions
- Mix: In a large bowl, mix the filtered water with kosher salt, soy sauce, and brown sugar. Stiruntil dissolved.
- Brine the Salmon: Submerge the salmon nuggets in the brine. Cover and refrigerate for upto two days—the longer, the better to enhance flavor.
- Rinse: Once brined, rinse the salmon under cold water to remove excess salt.
Step 2 – Prepare Sauce for the Perfect Glaze
Glazing the Salmon
The caramelized sticky sauce not only adds a delectable sweetness but also enhances the overall flavor profile with its rich, deep notes. It perfectly complements the dish, making each bite an explosion of irresistible taste and texture.

Sticky Sauce for Salmon Skewers
Ingredients
- 2 Oz Orange Juice
- 1 Tbsp Sriracha
- 2 Tbsp Honey
- ½ Tsp White or Rice Vinegar
- White Pepper to Taste
Instructions
- Reduce: In a saucepan, combine orange juice, sriracha, honey, and vinegar. Cook over medium heat until the sauce reduces by half, reaching your desired thickness. Add white pepper to taste.
Step 3 – Crafting the Asian Vinaigrette
Ingredients for the Vinaigrette
To elevate our salad, we need a delectable Asian vinaigrette!
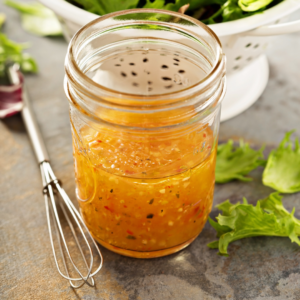
Asian Vinaigrette
Ingredients
- ¼ Cup Avocado Oil
- 1⁄3 Cup Seasoned Rice Vinegar
- 2 Tbsp Honey
- 3 Tbsp Sesame Oil
- 1 ½ Tsp Soy Sauce Use gluten-free, reduced sodium if preferred
- 1 ½ Tbsp Peanut Butter
- ¼ Tsp Ground Ginger
- ¼ Tsp Garlic Powder
- Pinch Salt
Instructions
- Combine Liquids: In a bowl, whisk together the avocado oil, rice vinegar, sesame oil, andsoy sauce.
- Add Sweetness: Mix in the honey and peanut butter until smooth.
- Season: Add ground ginger, garlic powder, and a pinch of salt. Whisk until all ingredients arewell combined.
If desired, the sauce can be prepared beforehand and refrigerated until ready to use. This saves time on grilling day and allows flavors to meld, intensifying the glaze. Store the sauce in an airtight container and refrigerate. Reheat gently before glazing the salmon skewers.
Similarly, the Asian vinaigrette can be prepared ahead. This enhances flavor, creating a more robust dressing. Store the vinaigrette in an airtight container and refrigerate. Shake or stir to re-emulsify before use. Preparing the vinaigrette in advance saves time and ensures the salad dressing is ready, making summer salad assembly quick and effortless.

Step 4 – The Perfect Base Salad by Jaclyn Barber
Fresh Ingredients for a Vibrant Salad
The foundation of our summer dish is a crisp and colorful Asian-inspired salad. The freshness of the salad ingredients pairs perfectly with the rich and flavorful salmon skewers. The herbs add a fragrant note, while the tangerine segments provide a juicy sweetness that balances the dish.
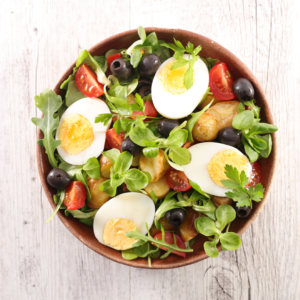
The Perfect Base Salad
Ingredients
- Egg Soft boiled
- Spring Mix
- Carrots Julienned
- Cucumber Sliced
- Radishes Sliced
- Tangerine or Mandarin Segments
- Fresh Herbs like Mint, Basil, and Cilantro
Instructions
- Boil Eggs: To prepare soft-boiled eggs: bring water to a boil, simmer eggs for 6 minutes,transfer to an ice bath for 5 minutes, peel, and serve
- Wash and Prep: Meanwhile, rinse the vegetables thoroughly. Peel and julienne the carrots,then use a mandolin to thinly slice the cucumber, apple, and radishes into rounds. Preparethe citrus segments and cut in half lengthwise.
- Herbs: Finely chop mint, basil, and cilantro. Sprinkle them generously over the salad forthat extra burst of flavor.
- Combine: In a large salad bowl, create a base with spring mix. Carefully arrange cucumber slices, julienned carrots, soft boiled egg and tangerine segments. Garnish with slivered almonds.
Step 5 – Bringing It All Together
Serving Suggestions
Once you have carefully arranged the prepared salad on a plate, place the glazed salmon skewers on top or beside it, depending on your preference for presentation. This arrangement not only looks visually impressive but also ensures that each bite offers a perfect balance of flavors, combining the freshness of the salad with the rich, savory taste of the salmon. For an added touch of indulgence, you can drizzle additional glaze over the skewers and sprinkle additional everything bagel seasoning if desired. Finally, complete the dish by drizzling the Asian Vinaigrette over the top, ensuring every component is perfectly seasoned and ready to be enjoyed.
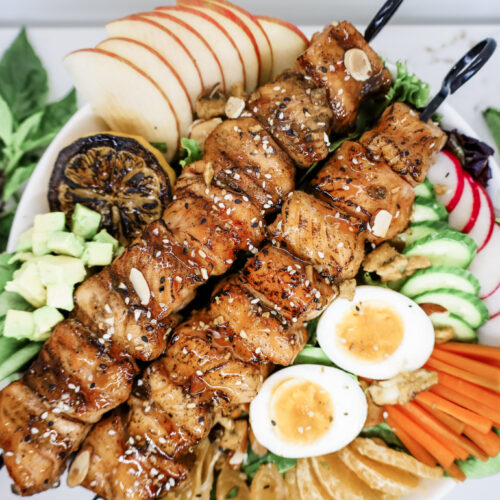
Grilled Salmon Skewers
Ingredients
Sticky Sauce
- 2 Oz Orange Juice
- 1 Tbsp Sriracha
- 2 Tbsp Honey
- ½ Tsp White or Rice Vinegar
- White Pepper to Taste
Salmon Skewers
- Salmon Filets Cut into nuggets
- Wooden or Metal Skewers Soaked if wooden
- Neutral Oil for Brushing Vegetable or canola oil
- Sticky Sauce See above
- Everything Bagel Seasoning For garnish
Instructions
Sticky Sauce
- Reduce: In a saucepan, combine orange juice, sriracha, honey, and vinegar. Cook overmedium heat until the sauce reduces by half, reaching your desired thickness. Add whitepepper to taste.
Salmon Skewers
- Skewer the Salmon: Thread the salmon nuggets onto the skewers.
- Grill & Glaze: Preheat your grill to medium heat. Place the skewers on the grill and cook, turning occasionally for even cooking. While your salmon skewers are about 80% cooked on the grill, begin applying the sticky sauce using a basting brush. Brush each skewer generously with the sauce, allowing it to caramelize on the surface. Continue grilling and occasionally turning the skewers, adding more sauce as needed, until the salmon has a beautifully glazed and caramelized exterior.
Notes
Creating a summer dish that impresses doesn’t have to be complicated. With our Asian-inspired salmon skewers and fresh salad, you have a recipe that’s both delicious and easy to prepare. This dish not only highlights the best of summer produce but also brings an exotic twist to your regular grilling recipes. Ready to elevate your summer grilling game? Try out this recipe and share your culinary creations with us.
For more tips and personalized guidance, connect with our growing community of food enthusiasts and submit your own recipes here.
Happy grilling!
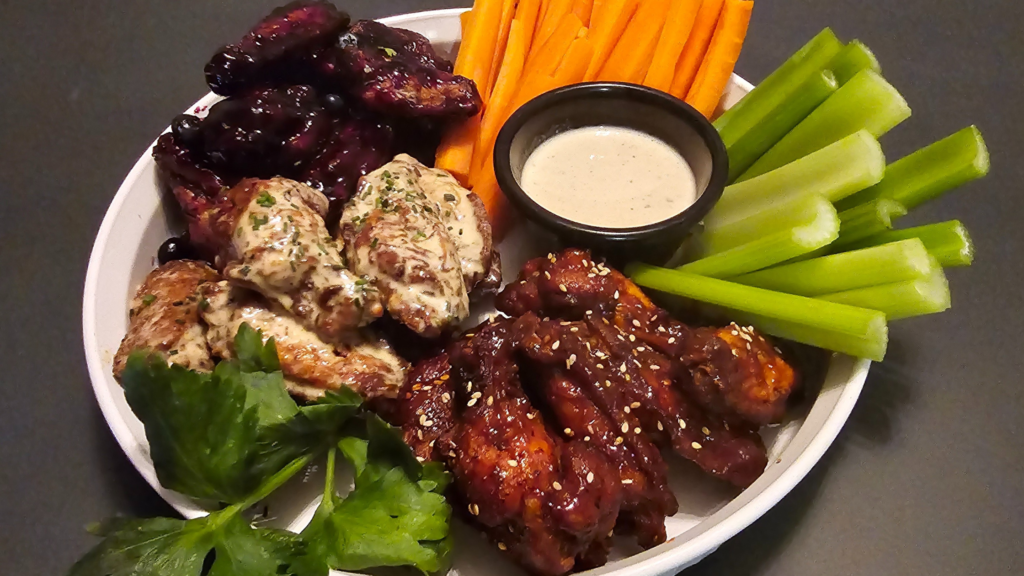
Star Spangled Chicken Wings
As we gather to celebrate the 4th of July, there’s no better way to honor the land of the free and the home of the brave than with a mouthwatering chicken wing feast. In a time when the world seems more divided than ever, food has a magical power to unite us all. This Independence Day, let’s come together over a tantalizing array of chicken wings that embody the spirit of unity and patriotism.
Whether you prefer them smoky and grilled, spicy and saucy, or crispy and fried, wings cater to all taste preferences, making them the perfect centerpiece for your Independence Day festivities.
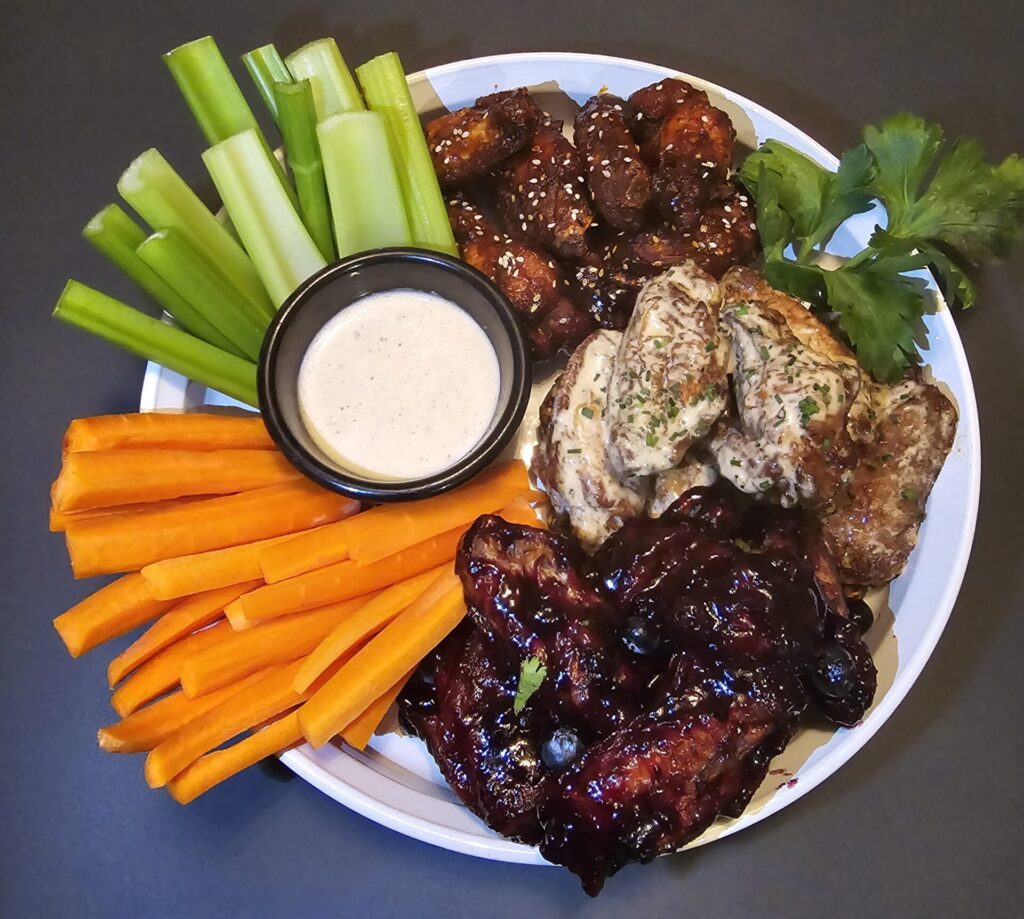
Adding yet another layer of patriotism, this feast was meticulously curated by Josh Kemp, a U.S. Army veteran who served one tour in Iraq and another in an 11C Infantryman from 2003 to 2007.
“This recipe is all about taking your time to elevate a classic American party dish into something memorable. The brine and dry aging of the wings are the key to making these wings the best that they can be.”
– Josh Kemp
Elevate with Brining
Brining chicken wings is a crucial step in achieving maximum flavor and juiciness. The process involves soaking the wings in a mixture of salt, water, and spices, allowing the flavors to penetrate deep into the meat. This not only enhances the taste but also helps to tenderize the chicken, ensuring that each bite is succulent.
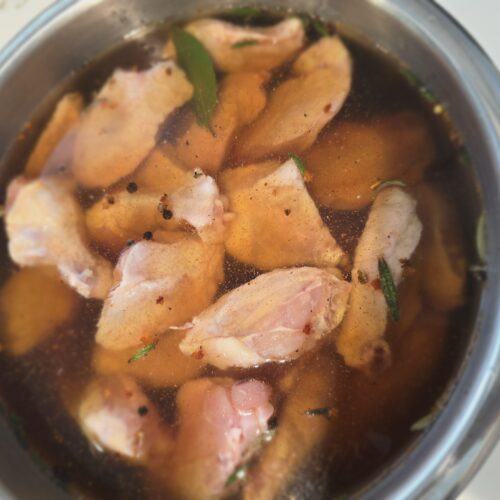
Wing Brine
Ingredients
- 2 ½ Lb Chicken Drumlettes & Winglettes 'Wingettes' are also known as 'flats'
- 6 Cups Warm Water
- ½ Cup Kosher Salt
- 4 Tbsp Soy Sauce
- ⅓ Cup Brown Sugar
- 3 Tbsp Red Pepper Flakes
- 2 Bay Leaves
- 2 Sprigs Rosemary Or other herbs
- 2 Tbsp Ground Black Pepper
- ¼ Cup Cider Vinger Or vinegar of your choice (black vinegar, sherry, rice)
Instructions
- In a large mixing bowl, combine all ingredients except the wings. Mix thoroughly, then taste the brine. It should be as salty as seawater; using too little salt will prevent the flavors from infusing into the chicken.
- Once the flavor profile meets your satisfaction, immerse the wings in the brine and refrigerate for 4 to 24 hours—the longer, the better.
- After the wings are brined and happy, drain the liquid from them and wash off the excess brine and herbs with cold water. Once the wings are clean of brine, pat them dry completely. The next step is to dry rub and chill the wings in the fridge. This will ensure maximum crispiness on the wings.
Notes
The Fireworks of a Dry Rub
A dry rub is a key ingredient in elevating ordinary chicken wings to an extraordinary culinary experience. It accentuates and enhances the flavors, creating a balanced and robust taste profile.
One of the most significant advantages of using a dry rub is the unparalleled crispy texture it imparts to the wings with a delectable crust. This crispy, flavorful exterior perfectly contrasts with the juicy, tender meat inside, creating a delightful textural experience.
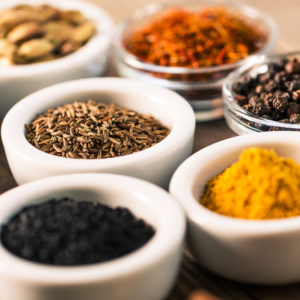
Wing Dry Rub
Ingredients
- 1 Tbsp Baking Powder
- 2 Tbsp Brown Sugar
- 1 Tsp Garlic Salt
- 1 Tsp Smoked Paprika
- ½ Tsp Onion Powder
- ½ Tsp White Pepper
- ½ Tsp Fresh Ground Black Pepper
- ¼ Tsp Cayenne Pepper
Instructions
- Combine all dry ingredients creating your dry rub.
- Pat wings dry with paper towels and add them to a mixing bowl and toss them in half of the dry rub.
- Place wings on a wire rack, skin side facing up, and add the rest of the dry rub to the wings' skin. Pat the dry rub into the wings by hand.
- Place the wings in your refrigerator uncovered overnight. This allows the skin on the wings to shrink slightly as moisture evaporates. Although the skin will appear to dry out a bit, this process helps achieve a crispier texture when cooked.
Cook Wings: 3 Easy Ways for Perfectly Crispy Results
When it comes to making the perfect chicken wings, you have three foolproof methods to choose from: baking, grilling, or frying. Each method offers a unique way to achieve crispy, juicy wings, whether you prefer the ease of baking, the smoky flavor from grilling, or the golden crunch of frying. Follow these simple steps to ensure your wings are cooked to perfection, reaching the ideal internal temperature of 160°F without overcooking. With a little attention to detail, you’ll have delicious wings ready to serve every time!
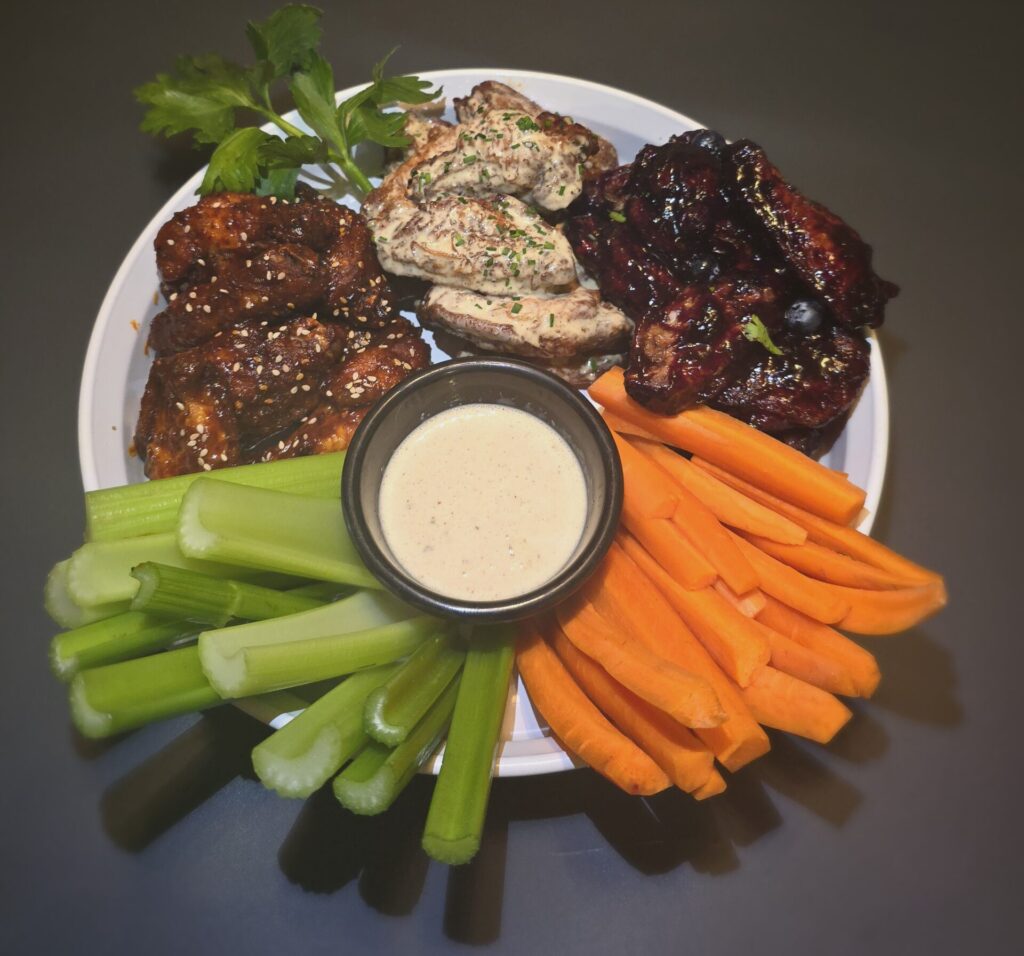
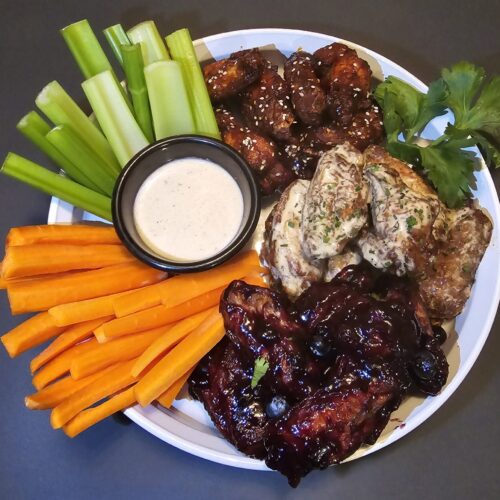
Cook Wings : 3 Easy Ways
Instructions
Option 1
- Bake the wings skin-side up at 425°F for 45 minutes or until they reach an internal temperature of 160°F. Convection ovens or air fryers are ideal for achieving crispier skin and may require less time.
Option 2
- Grill the wings until they are crispy and reach an internal temperature of 160°F.
Option 3
- Fry 'em up! Fry wings in batches in neutral oil at 350 degrees until crispy and golden brown. Once the wings look golden and crispy, check the internal temperature of 160°F.
Notes
American-Style Sauces
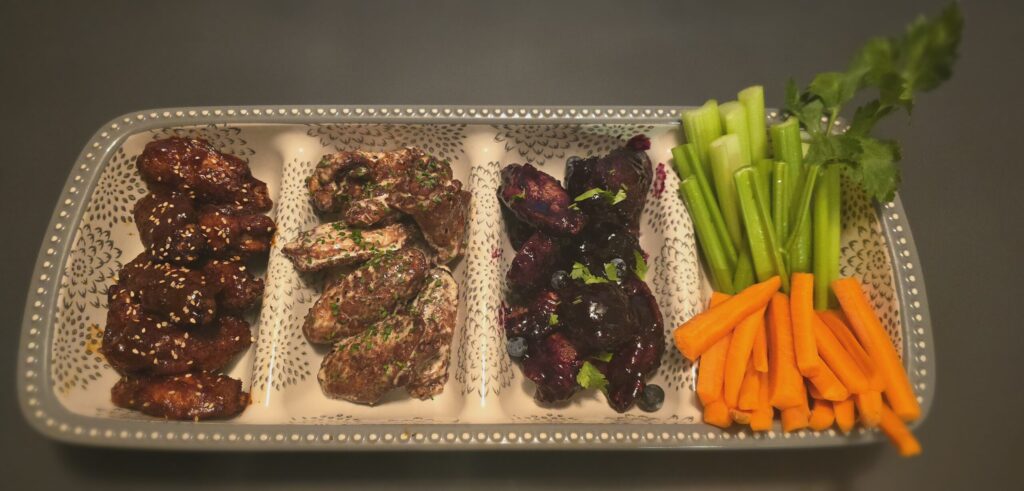
To ignite a sense of patriotism, the wings will be coated in the colors of our great nation. These vibrant sauces not only add a burst of flavor to your chicken wings but also visually celebrate the red, white, and blue of our nation’s flag. Together, these sauces not only enhance the flavors but also encapsulate the spirit of Independence Day. Each of the colors of our flag has a meaning.
Red Symbolizes Valor & Bravery
You’ll need some bravery to try this spicy sauce! For a fiery kick and vibrant hue, we’ll use Gochujang Chili Sauce. This tangy and spicy sauce delivers a bold flavor that will ignite your taste buds.

Gochujang Chili Sauce for Wings
Ingredients
- 1 Tbsp Neutral Oil Avocado oil suggested
- 1 Clove Garlic Minced or micro-planed
- 1 Tbsp Ginger Minced or micro-planed
- ½ Tsp Salt
- ½ Tsp Ground Black Pepper
- 2 Tbsp Soy Sauce
- 2 Tbsp Brown Sugar
- ½ Tsp Toasted Sesame Oil
- 1 Tbsp Rice Vinegar
- 3 Tbsp Gochujang
- 1 Tbsp Toasted Sesame Seeds
- 2 Green Onions Sliced thin for garnish
Instructions
- Heat oil on medium to low heat. Cook garlic and ginger for 2 minutes, but do not brown them.
- Remove from heat and mix in the rest of the ingredients minus the garnish.
- Toss wings in sauce before serving then sprinkle with green onions and sesame seeds.
White Symbolizes Purity and Innocence
Next, for a creamy and tangy contrast, there’s the classic Alabama White Sauce. This mayonnaise-based sauce, with its hints of vinegar and mustard, brings a touch of purity that perfectly complements the crispy texture of the wings.

Alabama White Sauce for Wings
Ingredients
- 1 Cup Mayonnaise
- ⅓ Cup Apple Cider Vinegar
- 2 Tbsp Honey
- 1 Tsp White Pepper
- 1 Tsp Ground Black Pepper
- ½ Tsp Garlic Salt
- ¼ Tsp Cayenne Pepper
- ½ Tsp Dijon Mustard Maille preferred
Instructions
- Mix all ingredients in a large bowl until well combined, then set aside to allow the flavors to meld together.
- Toss them in the prepared sauce, ensuring each wing is evenly coated. Serve immediately for the best flavor and texture.
Notes
Blue Symbolizes Vigilance, Perseverance and Justice
Finally, to complete our patriotic palette, Sticky Blueberry Sauce will bring a surprising and delightful sweetness. This unique sauce not only adds a pop of color but also a tantalizing twist to your chicken wings, embodying the spirit of perseverance in every bite.

Sticky Blueberry Sauce for Wings
Ingredients
- 1 Tsp Garlic Salt
- ½ Tsp Freshly Ground Black Pepper
- ½ Cup Blueberry Preserves
- 1 Tbsp Low-Sodium Soy Sauce
- 1 Clove Fresh Garlic Grated
- ½ Tbsp Fresh Ginger Minced
- 1 Tsp Lemon Juice
- ½ Cup Fresh Blueberries
- 2 Jalapeños One minced, one thinly sliced
Instructions
- Add the blueberry preserves, soy sauce, garlic, ginger, lemon juice, minced jalapeños, and fresh blueberries to a small pot over low heat. Stir to combine.
- Bring to a simmer and continue to cook on low until reduced and slightly thickened, about 15 minutes.Note: Taste the minced jalapeno for heat level before adding to the sauce. Many store-bought jalapenos are no longer hot, but sometimes you will buy a properly hot one. Add to your preferred heat level. You can remove the seeds to reduce the heat level if preferred.
- Toss wings in sauce and garnish with fresh thin jalapeno slices and a few fresh blueberries before serving.
Embracing the diversity of flavors that make American cuisine so special, these perfectly brined and creatively seasoned wings are a true homage to the “Home of the Brave.” Whether enjoyed during a festive gathering or a casual cookout, these wings promise to bring people together in a celebration of taste and tradition. So, fire up that oven, grill, or fryer, and dive into the bold, uncharted flavors of these uniquely American wings. God bless America!

The Perfect Pup Cup
This One Is For The Dog Lovers
We all know the Starbucks drive-thru is a haven for both coffee lovers and their furry companions. The joy is palpable in the eyes of dogs when they are treated to a signature Starbucks Pup Cup. This delightful freebie is a small serving of whipped cream, served in a petite cup, a special indulgence for our four-legged friends.
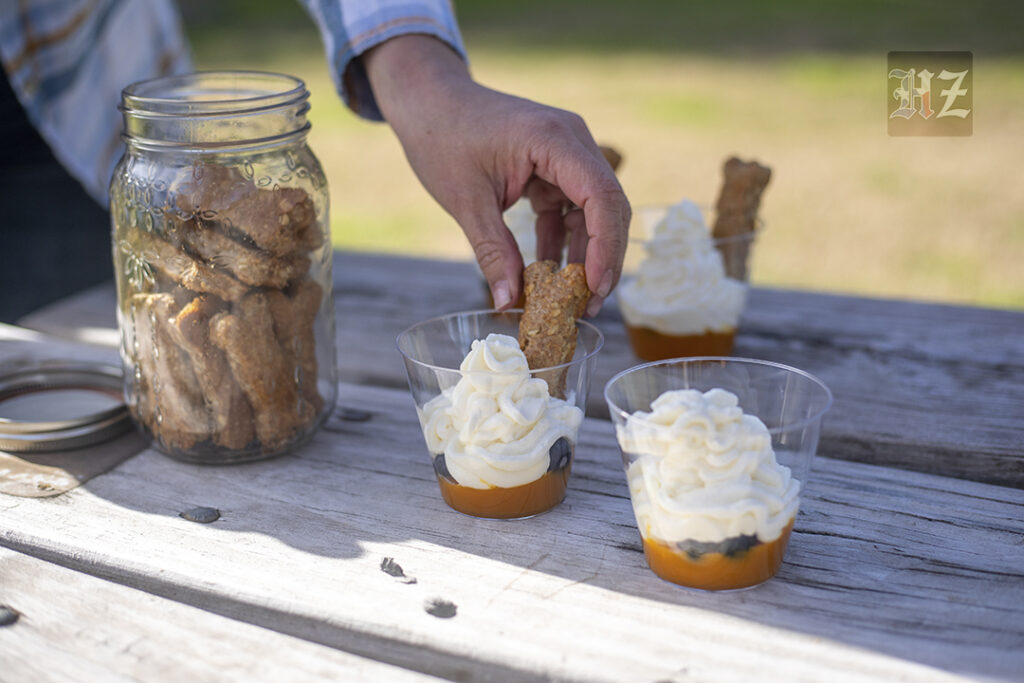
The Truth About The Starbucks Pup Cup
Before we dive into the yummy world of homemade treats, it’s crucial to acknowledge the potential drawbacks of indulging your furry friend in commercial offerings like whipped cream from Starbucks. While the occasional treat might seem harmless, many commercially available whipped creams contain high levels of sugar, artificial flavors, and other additives that can wreak havoc on your pet’s digestive system and overall health.

Spoil Your Best Friend (While Also Prioritizing Their Health)
What if you could let your dog join in on the fun right at home? Imagine recreating the joy of a Starbucks Pup Cup, but with a healthier (and tastier) twist. Envision whipping up a delicious treat using dog-friendly ingredients like rich pumpkin, creamy coconut, wholesome oats, and succulent blueberries? By choosing natural, unprocessed ingredients for your homemade Pup Cups, you maintain control over what your dog consumes, guaranteeing the highest quality snacks for your cherished canine.

Make The Perfect Pup Cup Today
Let’s embark on a delightful journey as I, alongside my loyal companion Bentley and his playful buddy Buck, set off for a scrumptious picnic in the serene setting of Landa Park in New Braunfels. You can witness the sheer joy radiating from their faces, a testament to the simple pleasures that life has to offer our four-legged friends. Here’s a simple recipe that will be sure to get tails wagging!

The Perfect Pup Cup
Ingredients
- 2 Tbsp Pumpkin Puree
- 1 Cup Heavy Cream Or coconut cream for the lactose intolerant
- 2 Tbsp Blueberries Fresh or frozen
- 2 Strawberries
- 1 Peanut Butter Dog Biscuit
Peanut Butter Dog Biscuit
- 2 Cups Whole Wheat Flour
- 1 Cup Rolled Oats
- 1/3 Cup Dry Milk Or dry coconut milk for the lactose intolerant
- 1/3 Cup Cornmeal
- 1/2 Cup Peanut Butter
- 1 Cup Hot Water
- 1/2 Cup Liquid Coconut Oil
- 2 Eggs
Instructions
- Whipped CreamBegin the process by taking your heavy cream (or coconut cream if your dog is lactose intolerant) and getting to whipping work! There are several ways to whip cream and you can choose the one that suits you best. Whatever method you use just keep whipping until you see the soft peaks form. Hint: It should look like whipped cream. 1. Whisk: If you prefer the good old-fashioned way - take a large bowl, pour in your cream and start whisking vigorously. This process requires a bit of elbow grease and can take about 5-10 minutes to achieve soft peaks.2. Whipped Cream Dispenser: For this method, pour the cream into your cream dispenser and follow its instructions on how to charge it with the nitrous oxide canister. Once done, give it a few shakes and dispense.3. Electric Mixer: Pour the cream into a large bowl, ensure that your mixer is set at medium speed, and start whipping. It should take about 2-3 minutes until the cream forms soft peaks.
- Begin by filling the bottom of a small-sized cup with canned pumpkin puree. Be cautious not to use pumpkin pie filling as it is not the same thing and can be harmful to your pet. Pumpkin puree not only adds a delightful taste but also provides your pup with a healthy dose of fiber and aids in healthy digestion.
- The next step involves adding a layer of fresh or frozen blueberries on top of the pumpkin. This should be approximately 2 tablespoons. Blueberries are a fantastic source of antioxidants and vitamins that are beneficial for your pup's health.
- Now comes the fun part. Take the freshly whipped cream (or coconut cream) and layer it gently atop the blueberries. Be sure to create a generous layer as this will be the part that your pup would probably enjoy the most. This delicious and fluffy topping is not only appealing to look at but also adds a creamy texture, making the pup cup a delightful treat.
- The final step involves topping off the pup cup! Slice up a couple of strawberries and arrange them on top of the whipped cream. Here I used a heart shaped cookie cutter to shape the strawberries, but with absolute certainty I can tell you that Bentley and Buck did not notice. Sprinkle a few more blueberries for added color and nutrition.
- Then, garnish it all with a peanut butter dog biscuit (see recipe below). And voila! Your pup cup is ready to be served. Serve immediately or refrigerate it for later use.
Peanut Butter Dog Biscuit
- Preheat: Set your oven to preheat at a temperature of 375 degrees and arrange parchment paper on your baking tray.
- Combine the Dry Ingredients: In a large bowl, mix the whole wheat flour, oats, dry milk, and cornmeal. If your pup is lactose intolerant, you can easily substitute the dry milk with dried coconut milk to ensure they can still enjoy these tasty biscuits without any digestive discomfort.
- Combine the Wet Ingredients: In a medium sized bowl, mix the peanut butter, hot water, and coconut oil. It's crucial to select a natural peanut butter variant for this recipe. Aim for peanut butter without any added sugars or stabilizers, as these are the most beneficial for your pooch. Beware of certain brands that include xylitol in their peanut butter, as this ingredient is hazardous for dogs. Carefully read the ingredients labels.
- Combine Both: Add the wet ingredients to the dry ingredients and fully incorporate. I find it easiest to use my hands.
- Shape the Biscuits: Flatten your dough until it's about 1/2 inch thick. Using a canine-friendly biscuit cutter or a standard cookie cutter, carve out your biscuits and arrange them on the baking tray you've lined with parchment paper. If you don't have a cutter at the ready, you can just shape the dough into small rectangles. Don't worry—your dogs will savor them just the same! If you have leftover dough, simply roll it out again and continue the biscuit-cutting process until no dough remains.
- Egg wash: Beat the two eggs in a bowl and use this as egg wash, brushing it over the biscuits before baking.
- Bake: Place the tray in your preheated oven and bake the biscuits for 25 -30 minutes, or until they turn golden brown. The cooking time will depend on the size and shape of your biscuits.
Notes
Keep them entertained longer by freezing your pup cups. Do you want to keep healthy treats on-hand?
Freeze multiple pup-cups for later use. Think of it as meal prep for your furry friend. Does your pup take any supplements?
Simply add them on top as a garnish – or hide them in the middle, it is your choice.

Hi there! I’m Jessy Mattix, your go-to food lover and writer with a a collection of unique experiences in boutique catering. My culinary adventure began with preparing healthy meals, and it flourished in the cozy corners of intimate gatherings where my skills in organizing dinner parties truly sparkled.
Come along with me as I share tales of culinary exploits, inviting you into a world where every dish has a tale, every meal sets the scene, and every dinner party celebrates our collective happiness.

